
So You Want to Build a Climbing Wall?

Our climbing wall took a lot of planning, research and trial-and-error and we learned a lot along the way (Shakori, Eno, and Occaneechi lands). Photo courtesy of Elise Bouffard
This summer my partner James and I took on the task of designing and building our own climbing wall. Even though some climbing gyms are starting to re-open, as healthcare workers, we do not feel safe climbing indoors. There are several lessons we learned during the process that we now want to share with you.
1) Do your research
The first thing we did was watch a ton of YouTube tutorials about building backyard climbing walls, including a few videos on constructing adjustable climbing walls. Since we were building a climbing wall that didn’t yet have any video tutorials or plans available online, we also watched tons of videos by professional carpenters on Youtube to learn the basics of carpentry how to frame safe sturdy wood structures. We looked up building codes in our area to ensure that we could build a climbing wall without a permit. Additionally, we esearched tools that we would need as well as lumber yards in the area. Here are a few YouTube videos that we learned from.
Scott Brown Carpentry- I definitely recommend subscribing to his YouTube channel. James and I have learned so much from him..
https://www.youtube.com/watch?v=cERPYDgZXPE
Send Story- We didn’t follow this guy’s entire build but the video really goes into the nitty gritty of building a climbing wall. It’s worth a watch.
https://www.youtube.com/watch?v=iWxRDhfPyPU&t=561s
Jenn Sends- Building a Home Climbing Wall
https://www.youtube.com/watch?v=SeRE3Ru2MRg
Metolius
We also read this home climbing wall guide written by Metolius.
https://www.metoliusclimbing.com/pdf/How-to-Build-a-Home-Bouldering-Wall.pdf
BONUS: Since we built an adjustable climbing wall, we had to do extra research on how to build a structure that was safe and wouldn’t collapse on a climber. We spoke to various people on Instagram who had built adjustable walls, watched YouTube videos, and studied photos of adjustable climbing walls that were already on the market.

This is the framing of our adjustable climbing wall. Photo taken by James Moyers
2) Make a budget and know that you’ll go over it.
As with all building projects, there are always hidden costs. Make sure your budget includes the cost of hardware, lumber, tools, equipment rentals etc.
A huge hidden cost that we discovered during our build was the purchase of bolts for outdoor use to screw in the holds. The bolts are coated in stainless steel and they ended up costing me over $100 that I had not anticipating spending.
3) Create a timeline for your build and know you’ll probably take longer.
My partner and I originally believed we would get the wall done in a month, but planning, gathering supplies, and waiting out bad weather meant our project went well over our timeline. It literally took us over a month just to design the wall and make plans. At first I was very anxious about the time frame but now, I realize it’s better to take the time and build something safe than to rush and potentially compromise the structural integrity of the wall.
4) Weatherproof your wood and get corrosion resistant hardware
You want to weatherproof your lumber ASAP, because you don’t want your wood to decay. There are two ways you can do this:
You can get pressure treated wood for the wall (and yes that includes pressure treated plywood).This type of wood maintains well through extreme changes in moisture. If you choose pressure treated lumber, once the wood dries out, after approximately 4-6 months, you have to seal the wood with either paint, outdoor wood sealer, or a stain. Treated wood is considerably more expensive, but was well worth the investment in terms of longevity of the wall.
You can get wood that isn’t pressure treated and paint/ stain the wood directly after building the wall. You will want to finish it as soon as possible.
we chose not to do this but it is possible.
All the metal hardware that you use needs to be able to withstand the outdoors. A Lot of metals tend to rust and degrade quickly if exposed to water, ie: rain or snow. Make sure to do your research and ensure any hardware you buy is rated to be out in the rain.
5) Spend the extra money and get the screw in T-nuts.
Every single hole made in a climbing wall needs a T-nut behind it if you plan on placing a hold in it. There are two types of T-nuts, the screw in T-nuts and the pronged T-nuts. The screw in t- nuts come with 3-4 small screws that you can drill into each hole on your climbing wall. The pronged T-nuts have 4 prongs that you can hammer into the plywood. The pronged T-nuts are cheaper and some climbing hold sets can sometimes come with pronged T-nuts for the holds you ordered; my issue with them is that they can pop out of the hole and shred the plywood around the hole. This then prevents you from ever putting a hold in that spot again. Instead of dealing with that risk, I decided to get the screw in T-nuts instead. They are a little bit more expensive and take longer to install but worth it for the peace of mind.
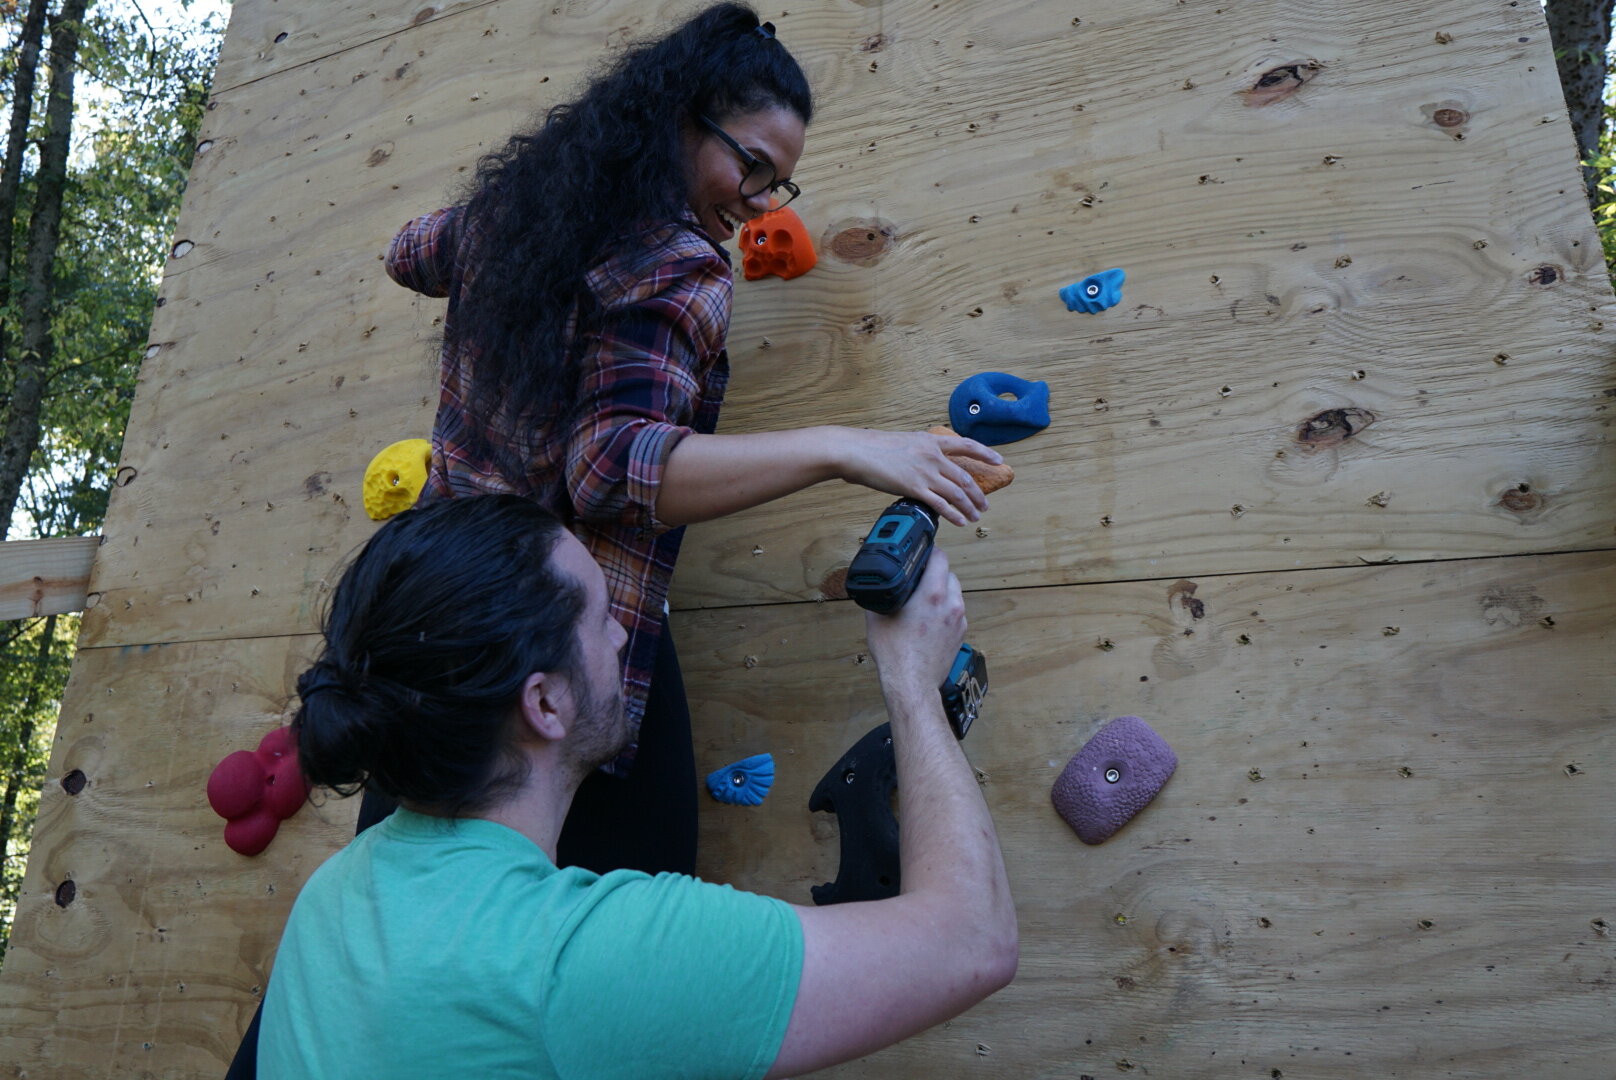
My partner James helping me bolt in a climbing hold. Photo taken by Elise Bouffard
6)Take your time with buying your climbing holds, they’re EXPENSIVE
Climbing holds can get expensive FAST and you’ll need SO MANY OF THEM. The way I afforded the holds was to buy them slowly over time. With every paycheck I put aside money for holds or bought a few at a time. Check Craigslist and Ebay, I was able to buy a few holds at a lower price through there too. My local climbing gym also had a sale on climbing holds where they were selling them cheap. We weren’t able to get holds because they all sold out, but a local Brown Girls Climb member was able to buy holds for cheap for her wall. Call your local climbing gym! You never know--they may be selling holds too. I was also able to save money by buying ceramic holds, they feel a lot more like natural rock and are definitely cheaper than polyurethane ones.
7) Make sure you have something to land on
James and I were lucky to have two big crash pads that cover a substantial area under the wall. If you don’t have a crash pad to put under your wall my suggestion is to get creative. I’ve seen some folks online use old mattresses covered in plastic, some folks made their own crash pads. There are plenty of options.
8) Be 100% honest with yourself.
Building a climbing wall is nowhere near easy, it can be frustrating and just downright hard. Know yourself and your limitations. Know when you need to phone a friend and ask for help. Lastly, be honest if this project is too difficult or too expensive. It’s perfectly okay if it isn’t the best endeavor for you to take on at this time.
9) Celebrate the little victories
Working on a climbing wall can take a long time. Celebrate the little accomplishments because they mean you are one step closer to achieving your goal. This helps boost your morale and the morale of anyone you are working with. And let’s be honest! Building a climbing wall is a big deal! You deserve to give yourself a pat on the back.
10) Have fun!
We all have our reasons for getting into climbing! This is a big deal! Have fun during the process! We believe in you! Good luck building your climbing wall! Climb on!
Builder, tinkerer, route-setter, and more! Photo courtesy of Elise Bouffard
As I mentioned earlier, my partner James and I built an adjustable climbing wall… Here are some of the hardware that we used specifically for that build.
Fence Hinges
Instead of using door hinges, to make adjustable walls, we used fence hinges that were rated to hold 300 lbs each. We bought three of them from this company.
Hand Winch
The way we adjust the wall is by using a hand winch. These things are super heavy duty because they are meant to pull trailers. The hand winch pulls a wire rope that is connected to the top corners of our climbing wall. When you crank the hand winch it adjusts the wall both up and down. The winch that we own is rated for 2500lbs (over 1 ton!) and has a self braking mechanism that prevents the winch from spinning out of control, even if you let go of the handle. We went with this super heavy duty winch for safety. The last thing anyone needs is for a wall to collapse on them while someone is climbing. Here’s a link to the website that sells the hand winch that we used.
https://www.northerntool.com/shop/tools/product_200670592_200670592
Steel Wire
We bought a 50ft aircraft grade long wire rope to pull the wall, the hand winch did not come with a steel wire, this is the one we used.
Trailer Pins
One of the security mechanisms that we have to prevent the wall from falling are trailer pins that we insert into the wall horizontally at the various angles we wanted the wall to sit at. Here are the pins that we used.

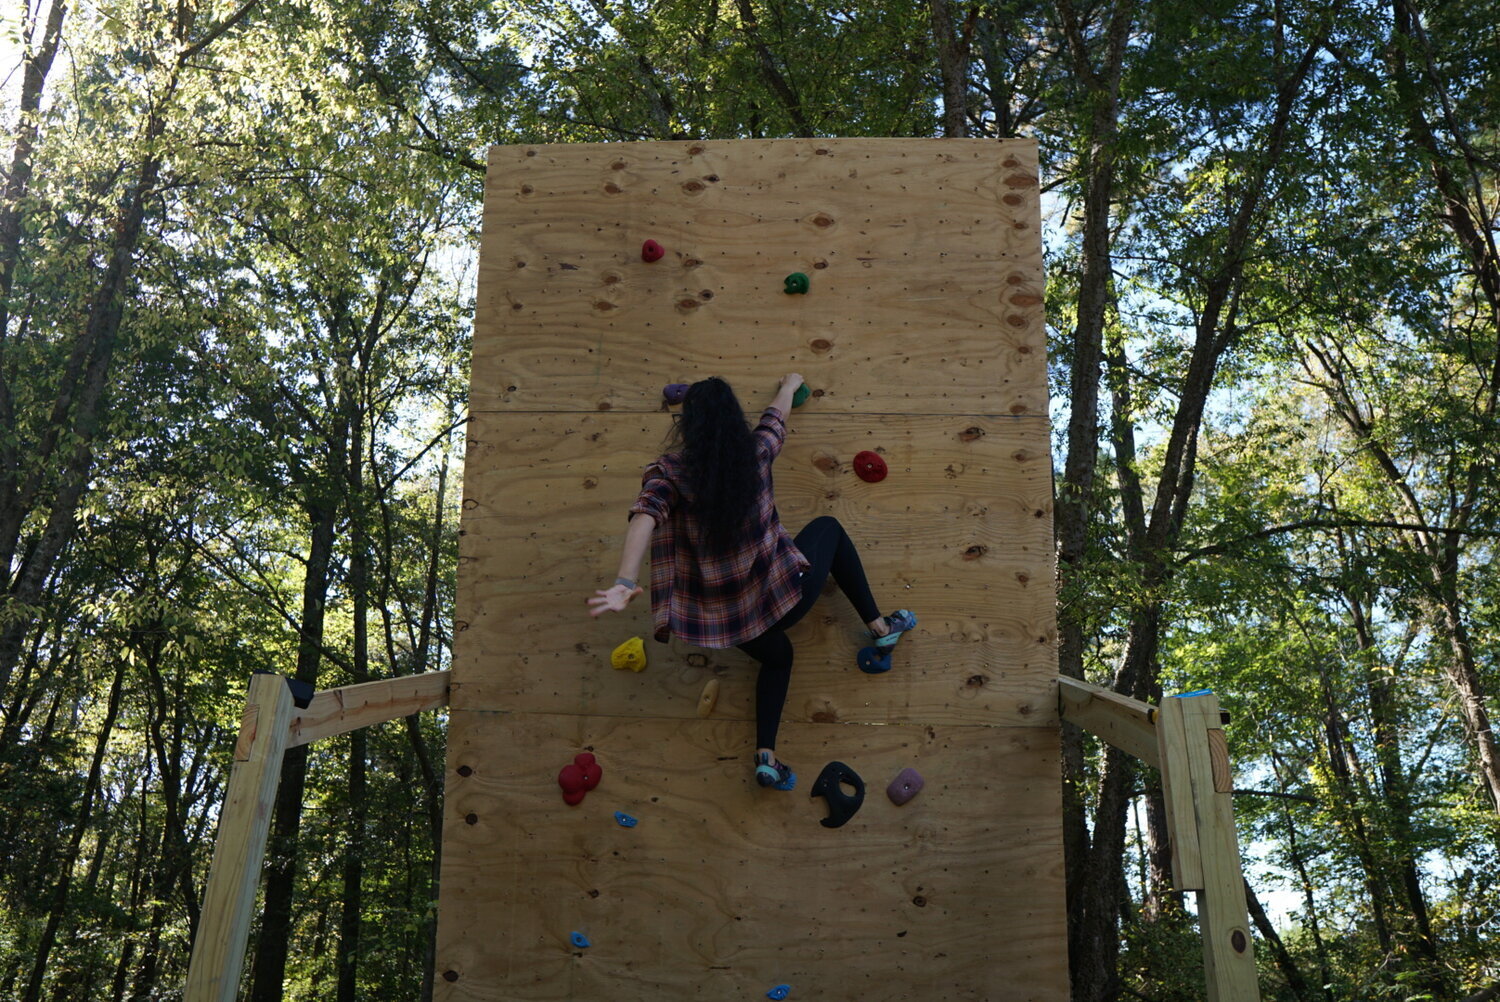
My partner, James, and our climbing wall. Photo courtesy of Elise Bouffard.


In 2021, I became the first female Kurdish sport climber in Bashur, Kurdistan (Northern Iraq). Everything I climbed was a first female ascent. This at first felt exciting! But with time, I realized it was a testament to the hardship Kurds have faced over the years.