
The Ultimate Backpacking Trip Through Utah and Arizona

Horseshoe Bend. Photo courtesy of Melissa Ameen
Planning an outdoor trip in an unfamiliar place can be quite nerve wracking. It’s important to consider questions such as what will the weather be like? What are conditions on the trail? What time will it get dark? Which items should I bring? What if I get lost or get injured?
Recently, I had to ask myself all of these questions when I planned a hiking excursion in southern Utah and northern Arizona. Unlike my regular backpacking trips near my home in North Carolina, this one involved traveling far out of my element and learning how to safely navigate an unfamiliar environment. I realized that I needed to do some research!
I spent hours researching my destination on weather almanacs, outdoor blogs, and the National Park Service website. The purpose of this article is to give insight on the five days and four nights I spent in Utah and Arizona—where I went, what I did, and how I got there; so you can do the same.
Before I begin I would like to acknowledge that the parks where my friends and I recreated are located on Southern Paiute, Ute, Hopi and Diné tribal and ancestral land. I’m grateful for their stewardship of the land.
Flying In
We flew into Las Vegas (LAS), the closest major airport to Zion National Park. LAS airport is roughly a 3 hour drive from Zion whereas Salt Lake City (SLC) is around 4 hours and 40 minutes away. So when planning a visit to Zion, I recommend that you fly into LAS. We landed in Vegas at midnight and made a quick Walmart run to stock up on food and supplies before we got on the road. Purchasing supplies after we arrived in Nevada allowed us to reduce our luggage, avoid costly fees and minimize stress! Do stock up before you get to Zion!—the closer you get to the park, the harder it is to find big box stores. We hit the road around 0330 and made it to Zion at 0630 hrs.
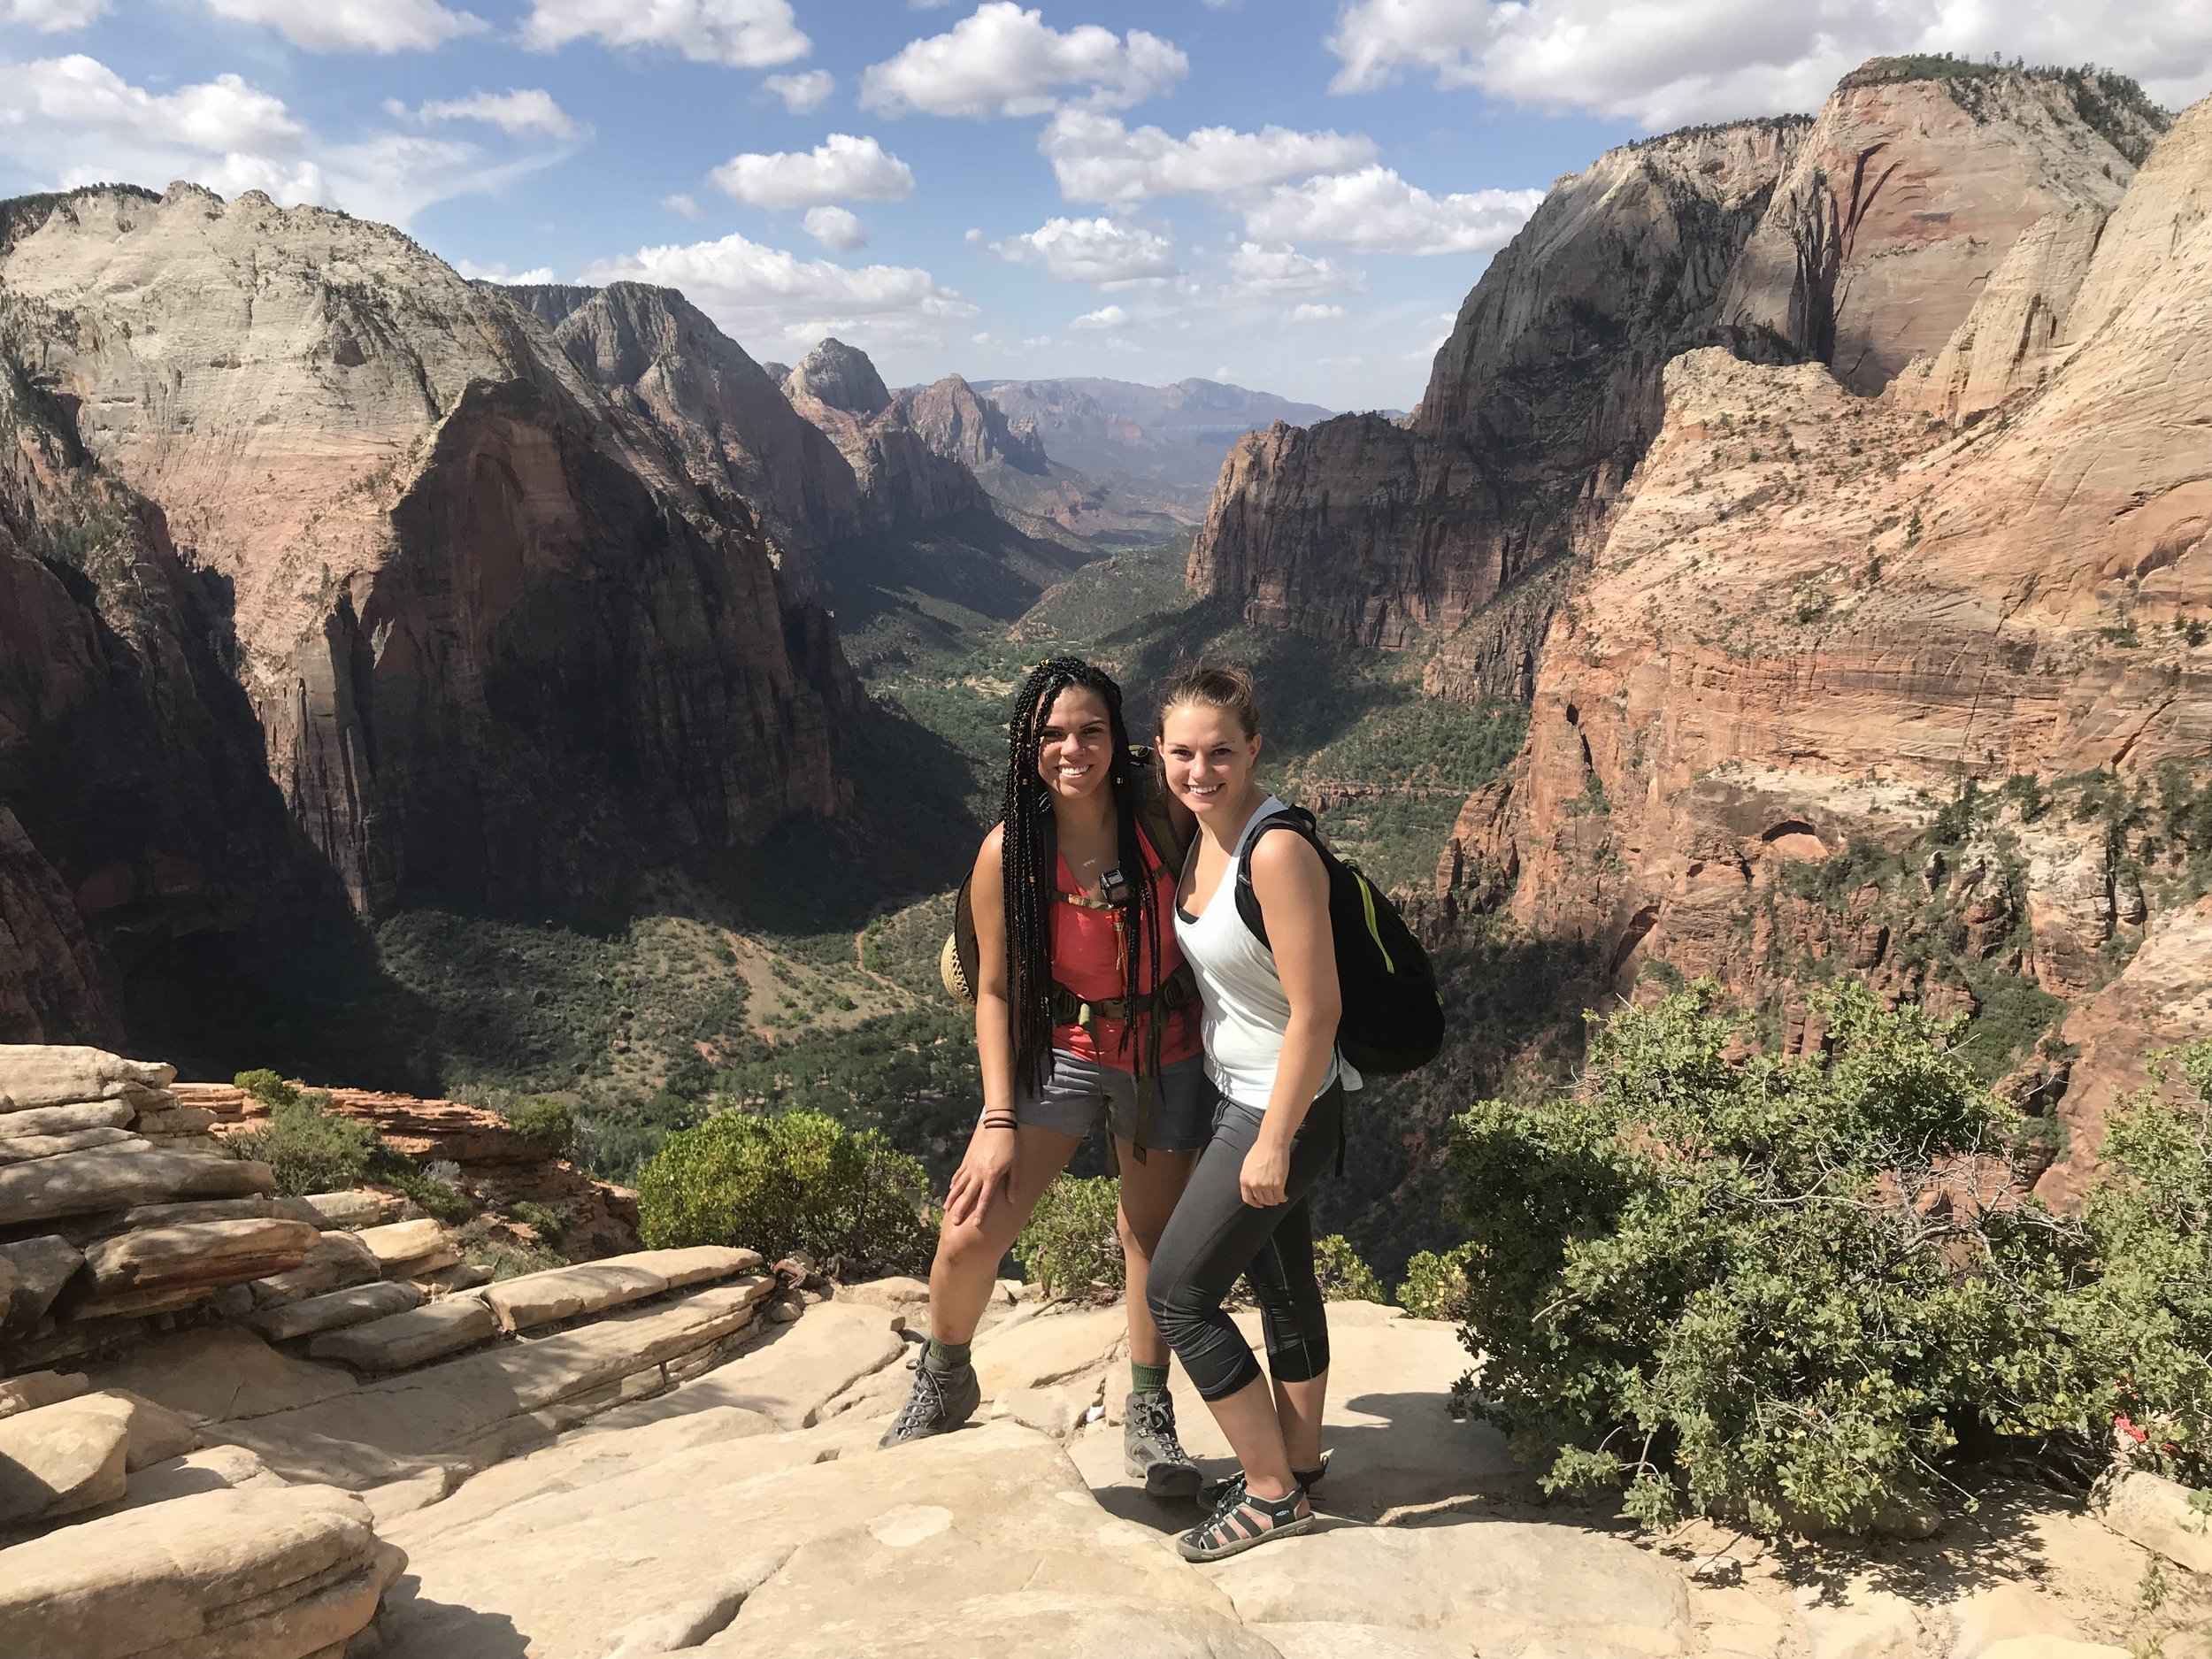
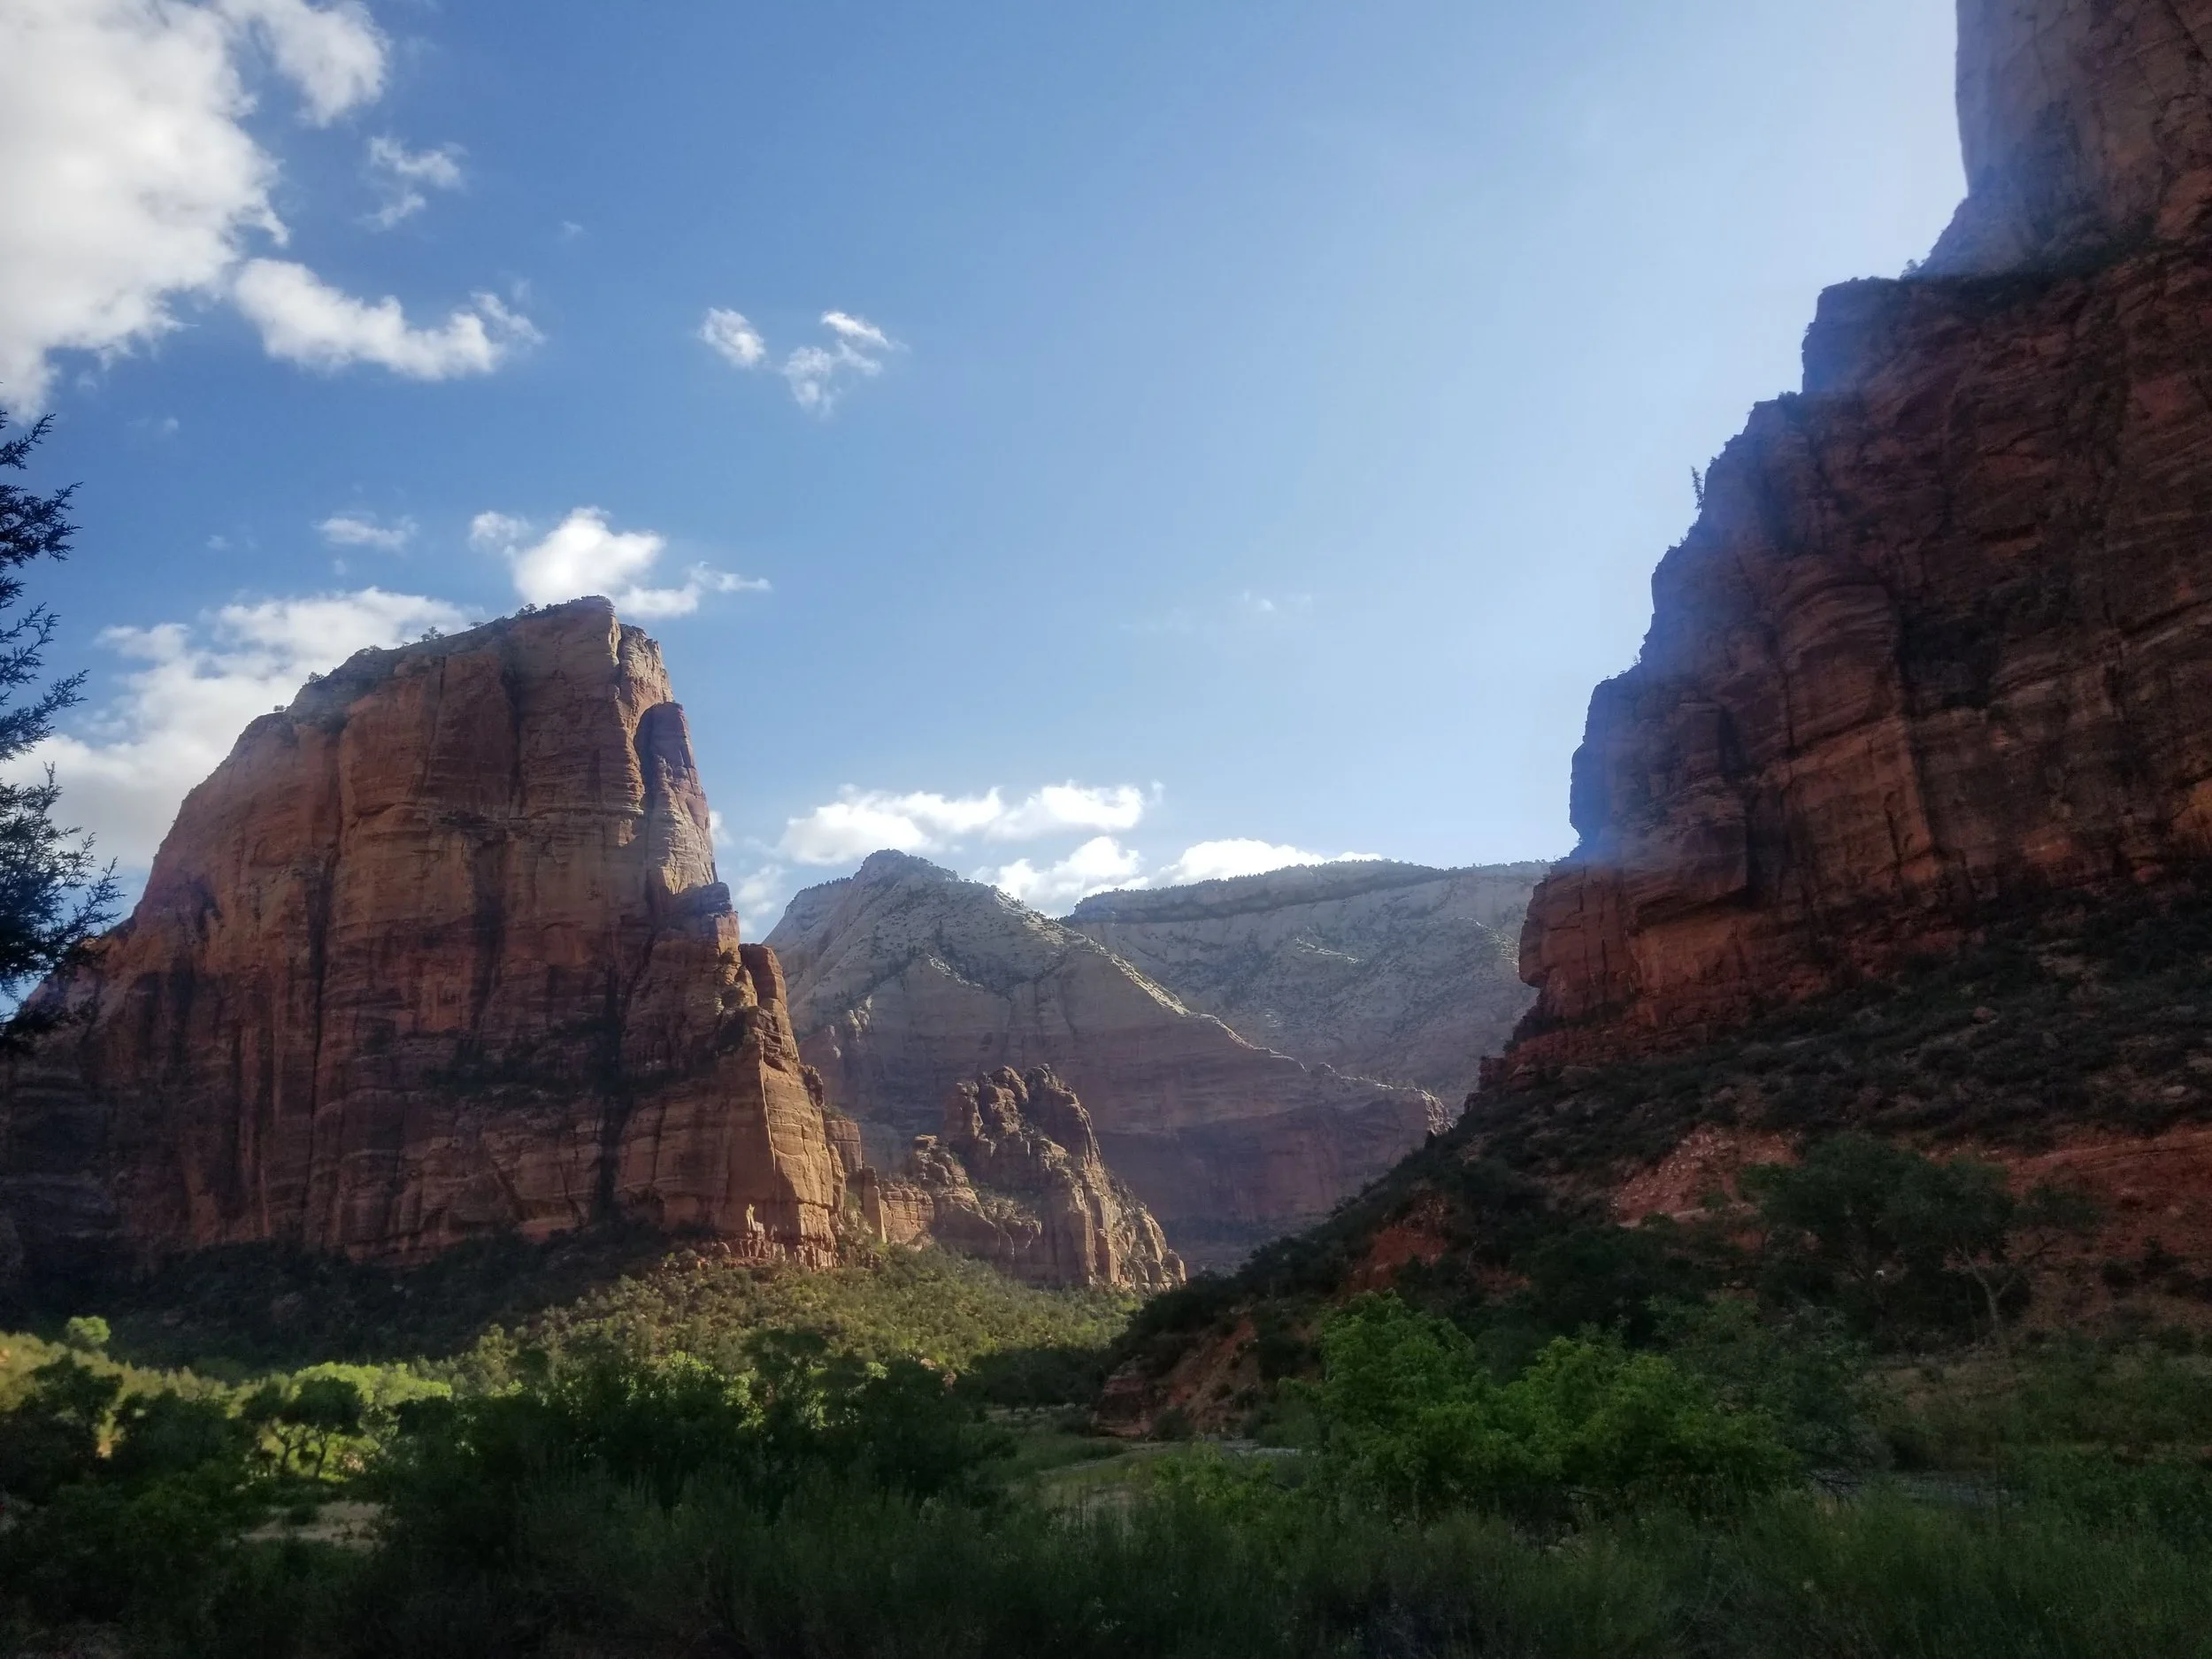
Nadia and Melissa at the top of Angel’s Landing. Photo courtesy of Amber Saterlee.
Day 1: Zion National Park: Angel’s Landing and Watchman Trail
Angel’s Landing
After an impromptu photo shoot at the entrance to Zion, we parked at the Zion-Mount Carmel Highway Junction (Note: we were oo-ing and ahh-ing so much that we completely missed the visitor center parking). We geared up and walked a short 1/4 mile to the Canyon Junction Shuttle Stop. It is important to note that in the summer the shuttle is the only way you can get around the park; therefore parking close to a shuttle stop is your best bet.
We wanted to start our adventure with a bang so after enthusiastically gearing up, and excitedly FaceTiming my mom in Florida, we hit one of the hardest trails in the park: Angel’s Landing. It’s a 2.5 mile strenuous hike with 1,500 ft in elevation gain. We started hiking around 0900 and made it up to the top before noon. The park opens at 0600; therefore, by the time we started there were already plenty of other hikers on the trail. The advantage of an early start was less traffic on the final 1/2 mile of the hike which involves navigating a series of switchbacks along a very narrow stretch of trail while holding onto metal chains bolted into the rock. If you’re not a big fan of heights this might not be for you.
** Tip: always communicate with others on this one lane section of trail. If you are ascending it is unsafe to share the metal chains with a descending group of hikers. It’s safer to wait your turn and allow one group to ascend/descend at a time. Congestion in this area can be dangerous. Falls have occurred. Take your time! If that means letting an impatient group rush past you then that’s okay! Your safety should come first.**
Once we made it back to the shuttle we decided to go back to our car, eat some snacks, regroup and head to Zion Adventure Company to rent gear for a hike we had planned for the following morning, the Narrows.
***At Zion Adventure Company you can pick up rental gear for the following day at any time after 3pm while only being charged a one day rental fee. If you plan on hiking the Narrows, I highly recommend you rent canyoneering shoes, neoprene socks and a walking stick. If you pick up your items the day before you can avoid lines on the morning of your hike.***
Camping Day 1
Although we had already booked a campsite at another location outside the park, I decided to ask the park rangers if there were any openings in the Watchman campground. We got lucky; there was a site open for just one night! After canceling my reservation at the other campground, we set up our tent and prepared dinner so that we could have time to make a hike during sunset.

(Right to Left) Nadia, Melissa, Amber, Laura
Watchman Trail
The Watchman Trail was our choice for a sunset hike. The difficulty level was just right after a long day. It also wasn’t very crowded at all. We enjoyed a nice bottle of wine at the lookout point, took a lot of pictures, and watched the sun set below the canyon horizon. Afterwards, my friends and I went back down to camp to look for a place to shower. There are no showers in the actual park.
**There are bathrooms with dishwashing stations and drinking water in the campground, so no worries on that front.***
Thankfully right outside of the campground is a bridge that takes you directly to Zion Outfitters, a store located adjacent to the park entrance that offers laundry and pay showers. Be mindful that the showers close at 10pm so try to get clean before then. My group showered and crawled into our sleeping bags by 2130 hrs. We were excited about getting an early start the next morning for Day 2: Hiking the Narrows
Day 2: Zion National Park: The Narrows
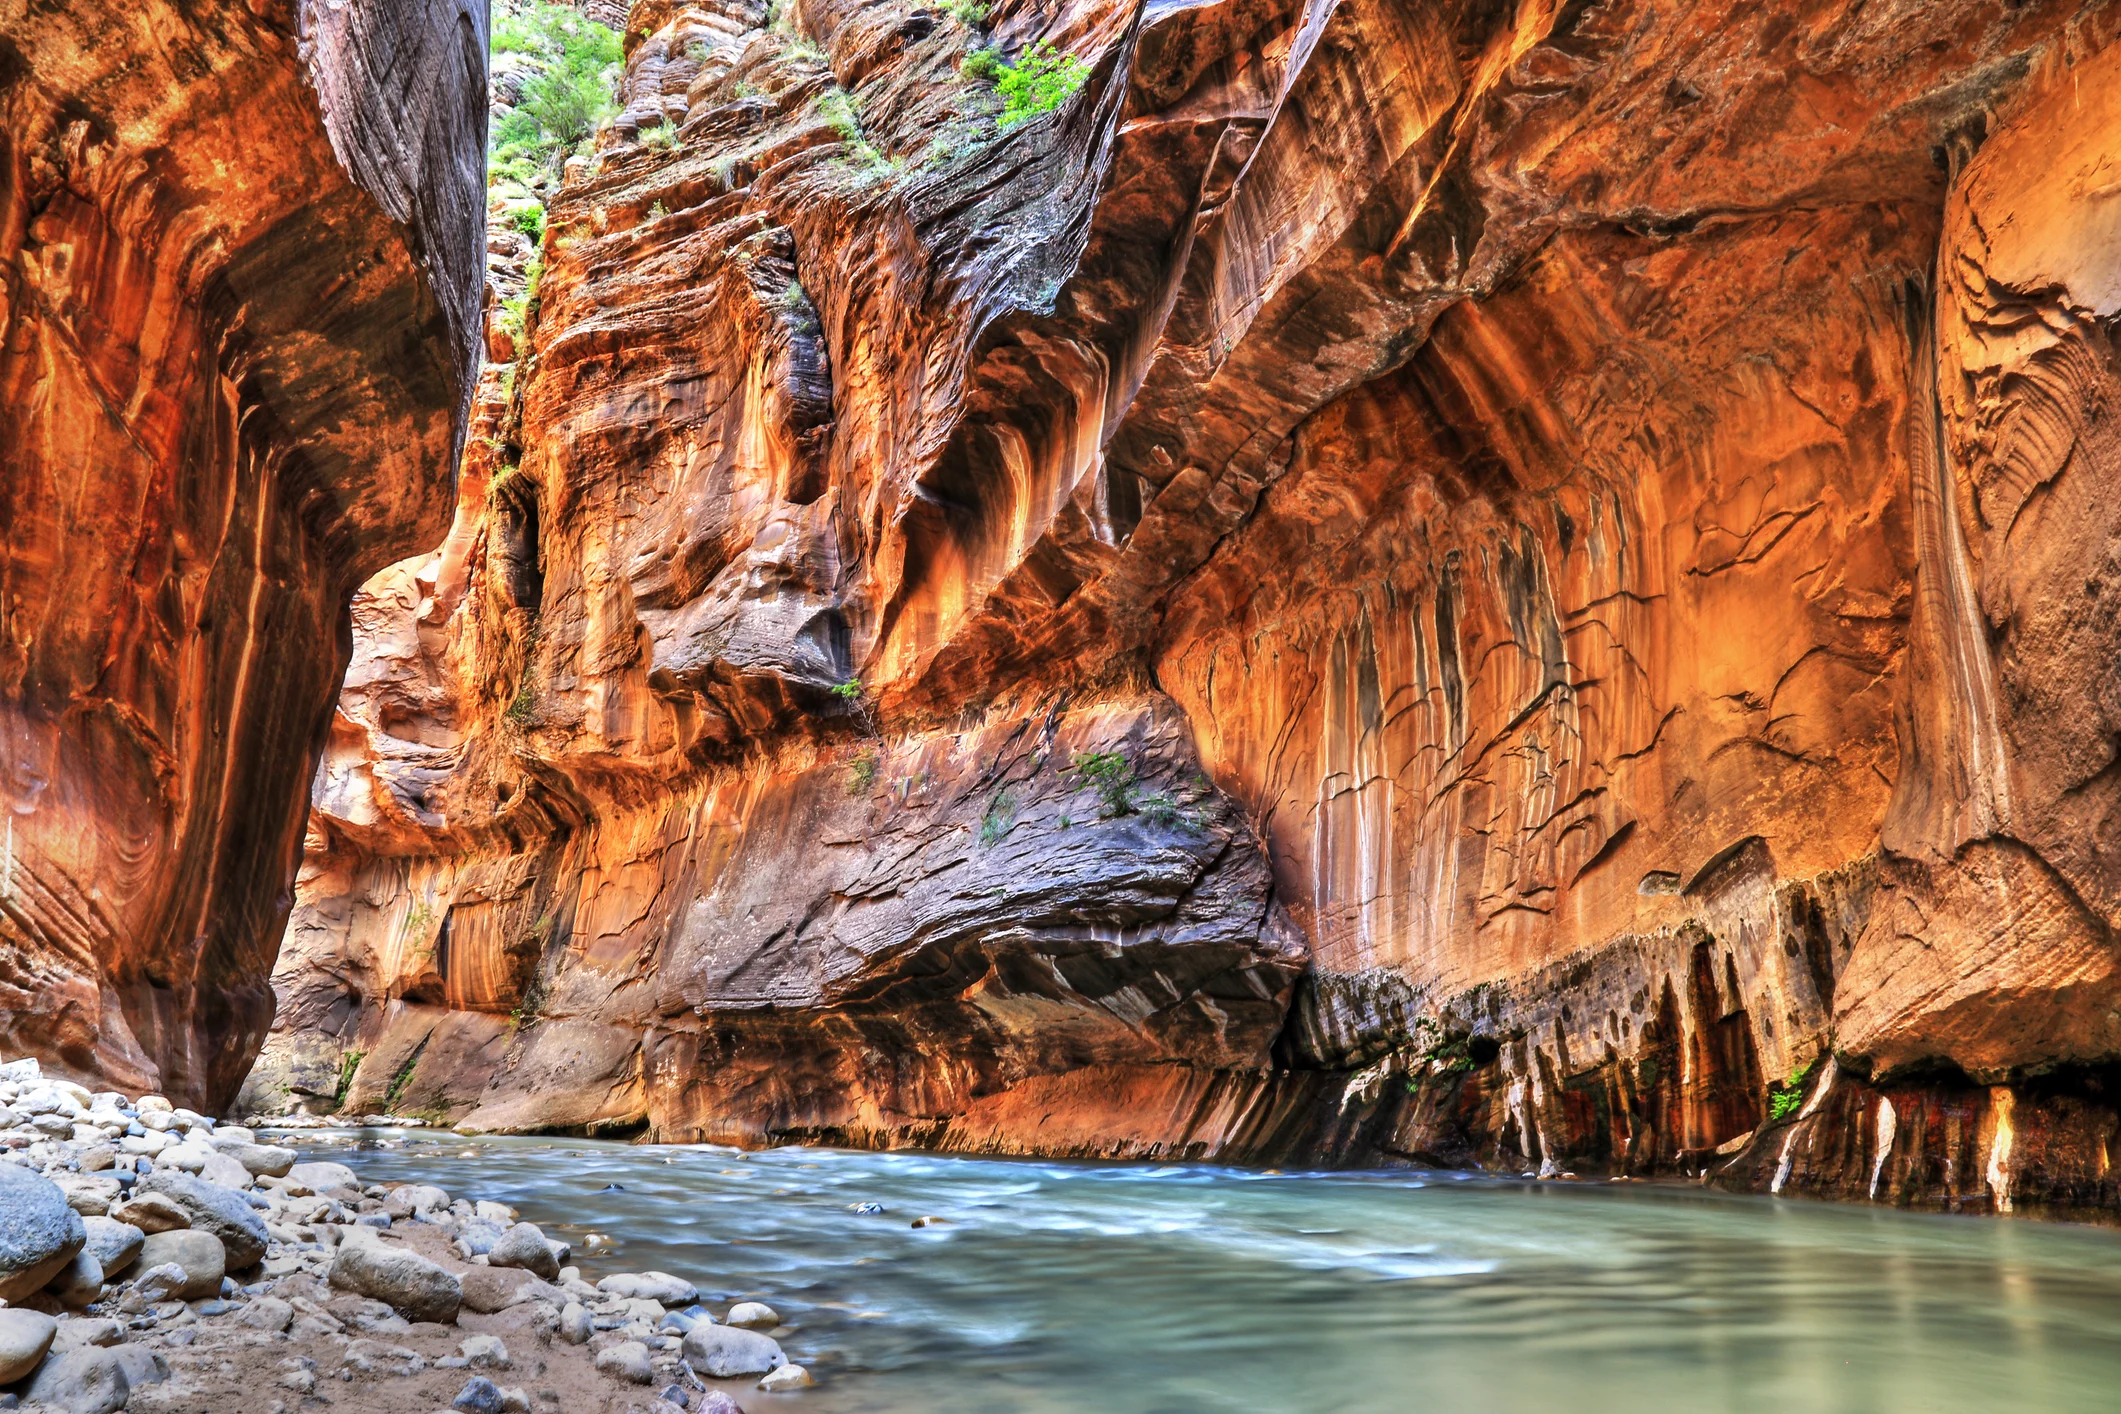
The Narrows, Zion National Park (Photo credit: Getty Images)
We started our second day very early at 0500 hrs. That gave us sufficient time to pack up our camp, eat breakfast and make it to the visitor center shuttle as early as possible. We made sure to pack plenty of snacks and water as we were planning on spending the entire day at The Narrows. We donned our canyoneering shoes early in order to minimize weight. The shuttle ride was 40 minutes long and we were among the first groups of people to start the hike. The hike starts on the River Walk Trail, a one mile paved path that takes you to the entrance of the Narrows. It was slow going initially because we first had to learn how to step on slippery rock without losing our balance. The wooden walking stick definitely helped.
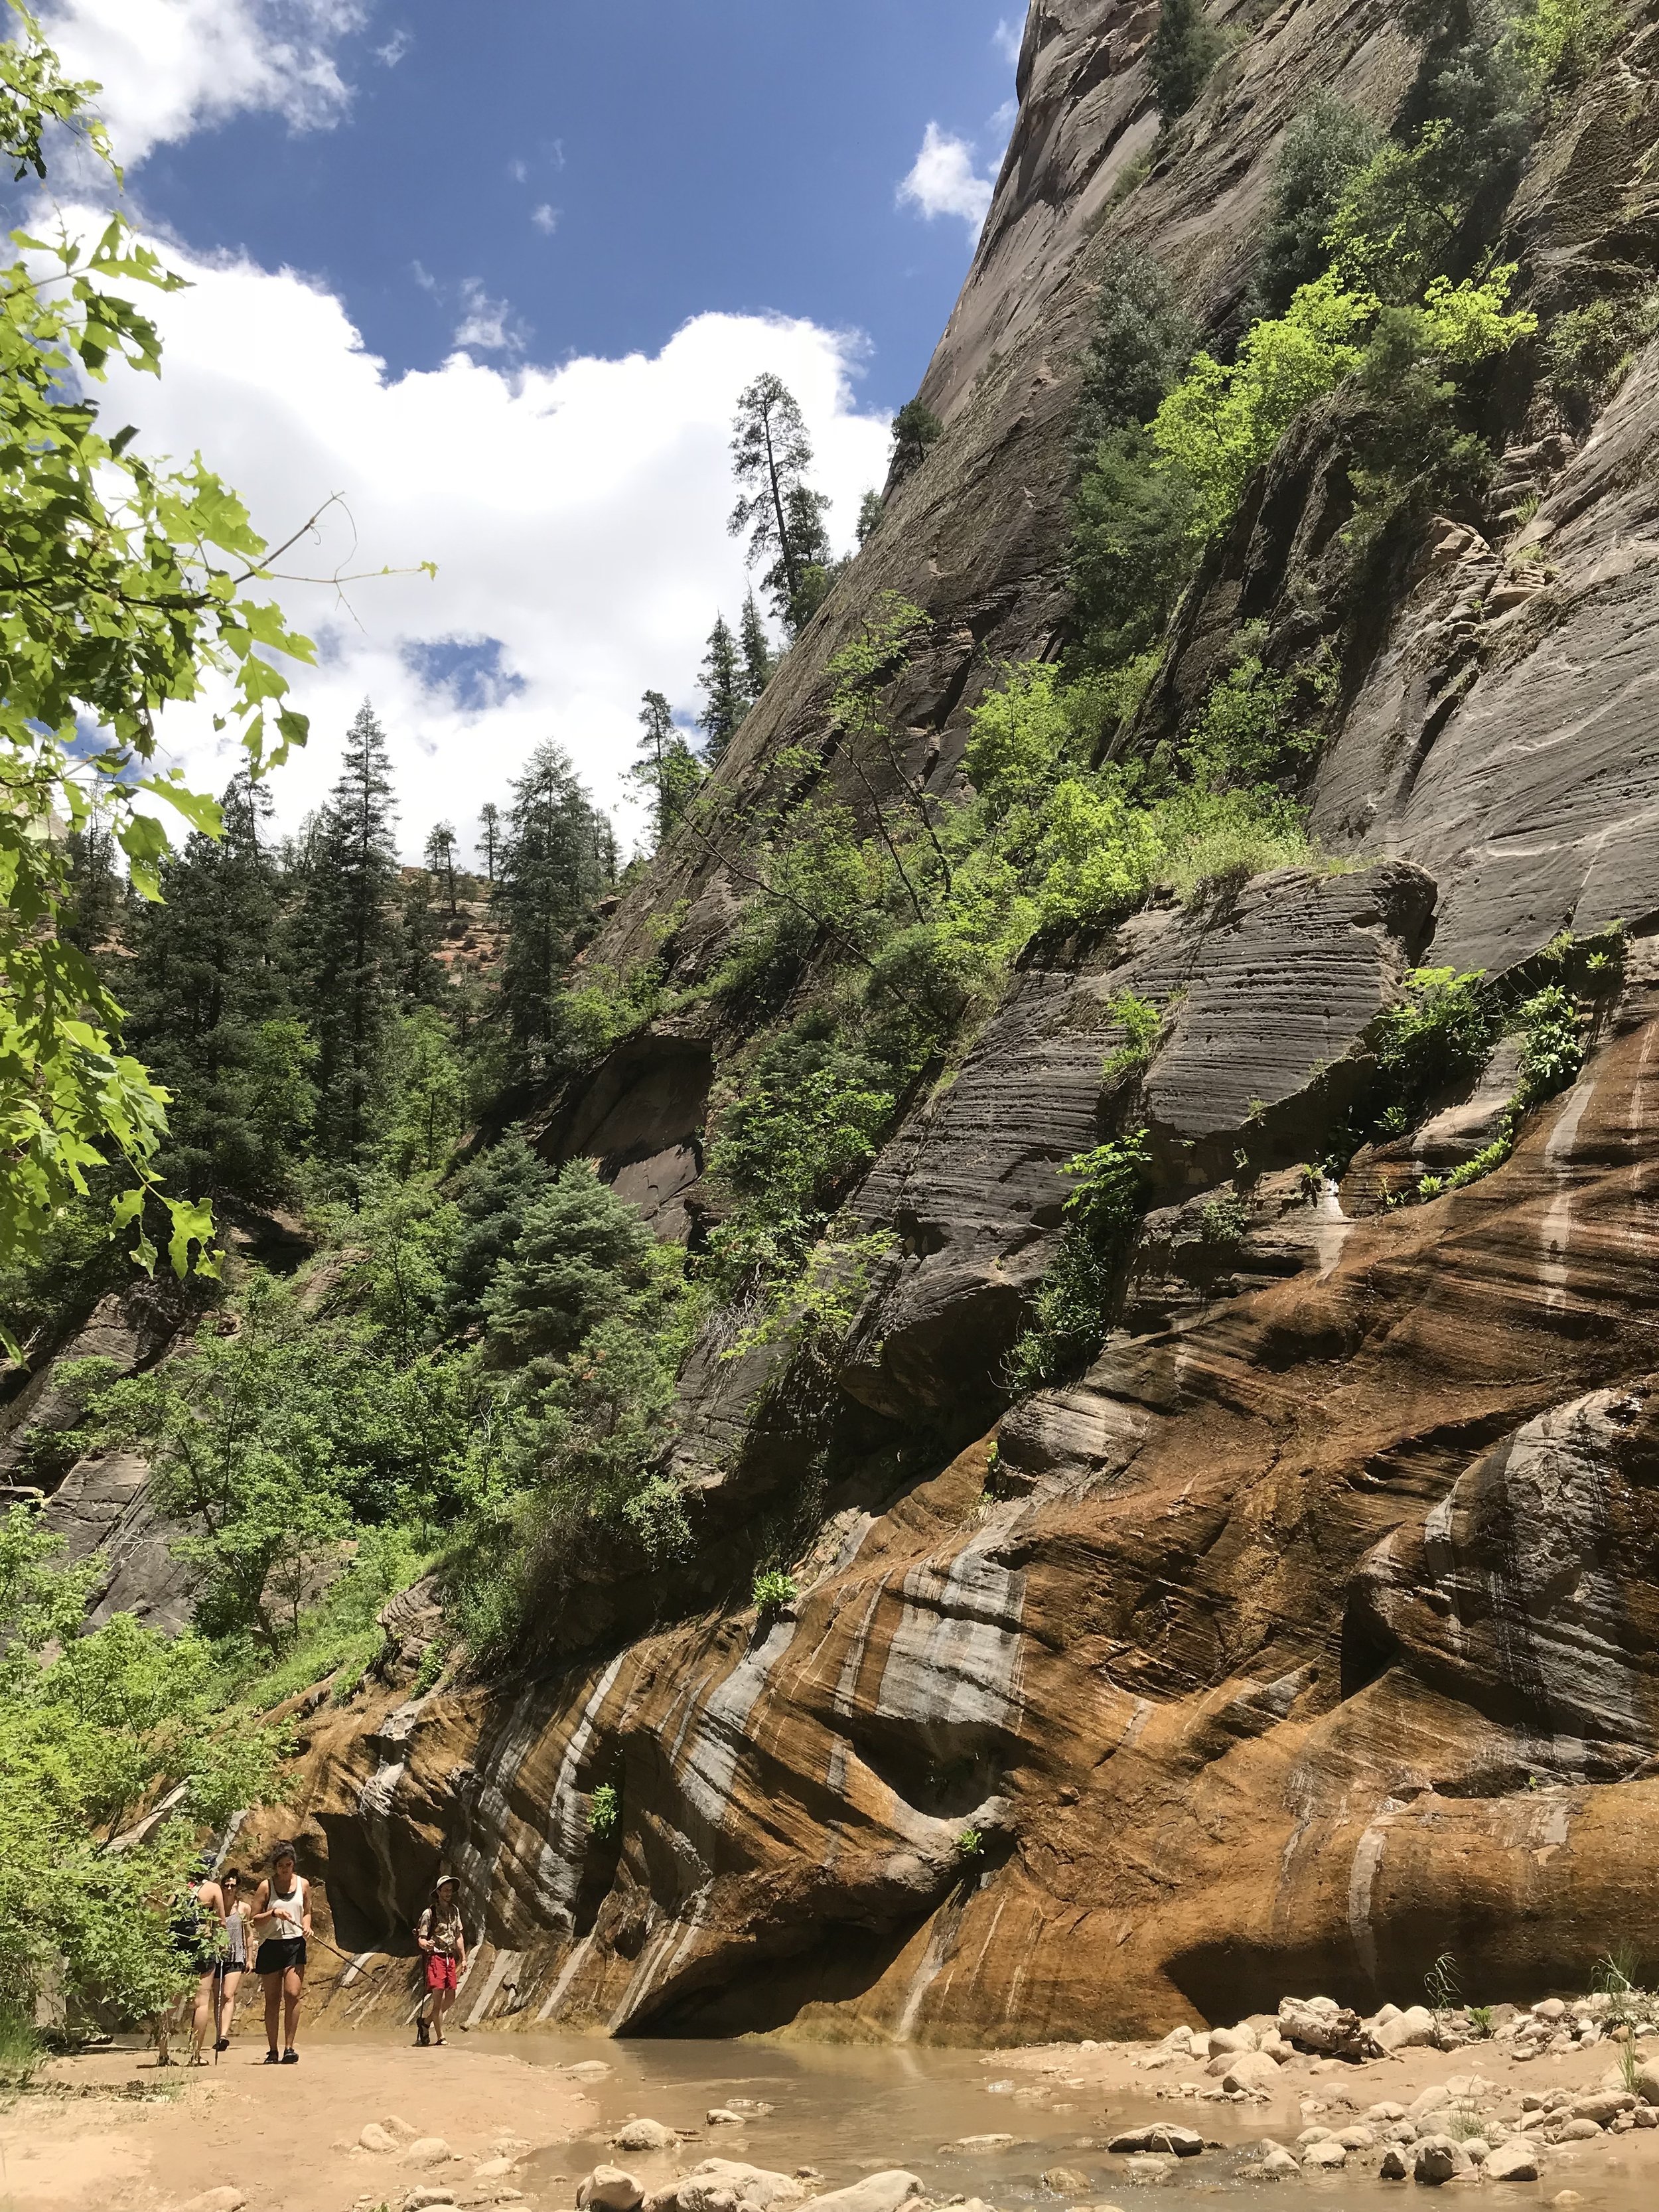
Orderville Canyon. Photo taken by Nadia Mercado
*** Tip: GET THE RENTAL GEAR! The boots provide much needed ankle support and the neoprene socks keep your feet surprisingly warm. The gear is well worth the $20. It’s also convenient not to have to carry around water logged gear the next day. Depending on what time of year you visit the park, you may want to rent additional items that will keep you dry in the water, as it can get very cold. If renting gear isn’t an option I highly recommend that you bring full coverage water shoes and trekking poles, because the rocks are VERY slippery.***
It took the entire morning for our group to hike the 2.5 miles up to Wall Street, a breathtakingly beautiful slot canyon where the walls almost converge. Afterwards, we backtracked and explored the Orderville Canyon side trail. This is where we had lunch and ventured to the falls.
The hike downstream was faster than the hike upstream. Aided by the current we made good time and returned to the shuttle station by 1430 hrs. We made our way back to Zion Adventure Company to return our gear and afterwards grabbed a meal at a brewery located outside of the park gates. Afterwards, we decided to use the scenic route to get to our next campsite and took the Zion-Mount Carmel Highway over to the east end of the park.
My advice is to TAKE THIS ROAD AND MAKE THIS DRIVE! The drive is completely worth it as it’ll take you through more remote regions of the park. If you have a GoPro put it on your dashboard and enjoy this ride. Once we made it out of the park we camped overnight at the Zion Park RV (Hi-Road Campground). The site had FREE showers and WiFi in their main family area which was very helpful since our shower at the park was restricted to a mere 5 minutes! After a slightly longer shower and dinner we went to bed as we wanted to wake up early for Day 3!
Zion-Mount Carmel Highway. Photo taken by Amber Saterlee
Day 3: Grand Staircase Escalante National Monument and Bryce Canyon National Park
Grand Staircase Escalante
On the third day of our trip we woke up at 0430 in the morning so that we could make the almost 3 hour drive from the eastern end of Zion National Park to Grand Staircase Escalante National Monument (GSENM). The drive was quite beautiful. We thoroughly enjoyed the sunrise over the mountains and, at one of the scenic overlooks in GSENM, we ran into a group of 30 Japanese motorcyclists! After an impromptu photo-op with our new friends we were on our way past Boulder, Utah to the trailhead of Lower Calf Creek Falls.
Since this area is considered Bureau of Land Management (BLM) land there is no fee to hike or camp. We left a $5 donation in a donation box at the trailhead to help keep the area well maintained. The hike to Lower Calf Creek Falls is 3 miles one way and relatively flat. It’s still a fairly tough hike because 1) it isn’t well shaded and 2) you are walking on sand. Therefore if you are doing this hike in the middle of the day please bring plenty of water and sunscreen. Also don’t wear sandals as the sand gets hot! There is also emergency water positioned along the way.
We started at emergency water marker 1. After hiking for approximately one hour through a canyon bordered with mineral streaked cliffs, we made it to the falls. They are located roughly one hundred yards past emergency water marker 14 and boy this place is worth it! There’s a 126 ft rainbow waterfall creates from a kaleidoscope of chossy rocks, vegetation and sandstone. My friends and I lingered for a couple of hours while we swam in the freezing water, ate lunch and enjoyed a nice glass of wine.
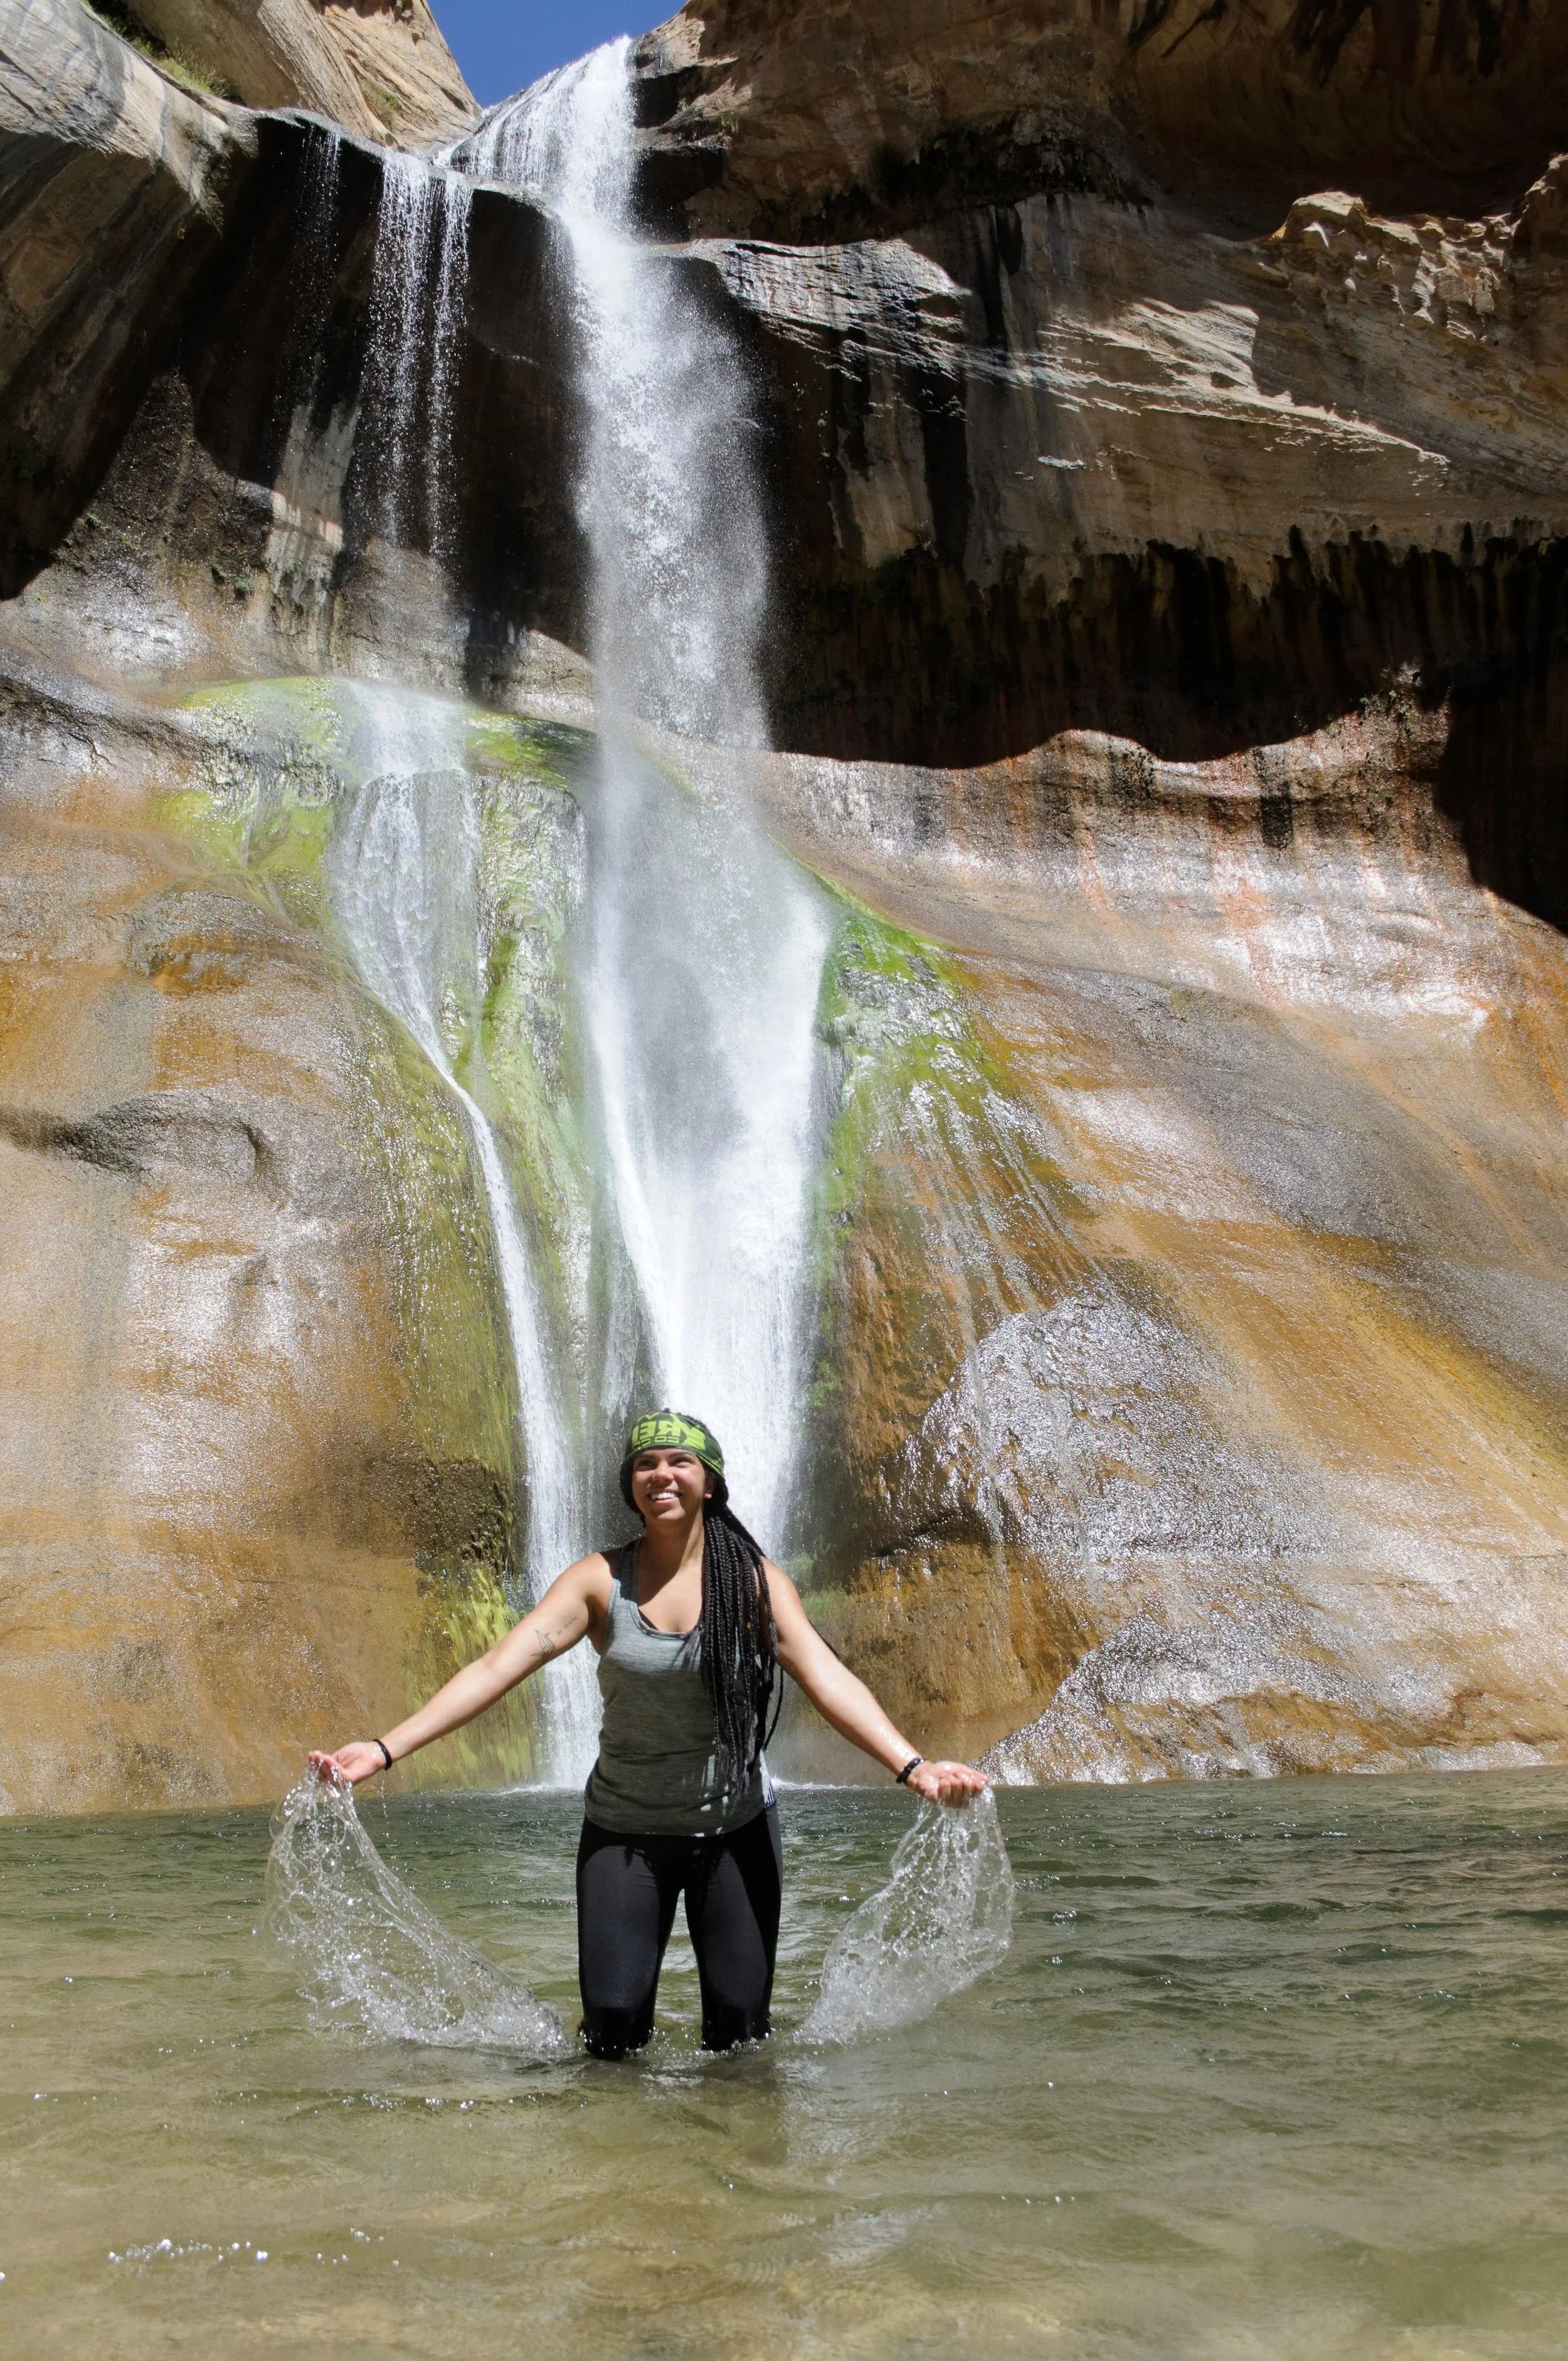
Lower Calf Creek Falls. Photo taken by Amber Saterlee
We made it back to the trailhead a little after noon and quickly loaded our car before making our way to our third campsite, The Riverside Ranch RV park and campground is located close to Bryce Canyon National Park. This campground by far had the best service! There was free coffee in the lobby and the campground host/ owner provided great sightseeing and dining recommendations. Additionally the showers there were quite clean and amazing compared to all the other places we had visited.
Bryce Canyon National Park
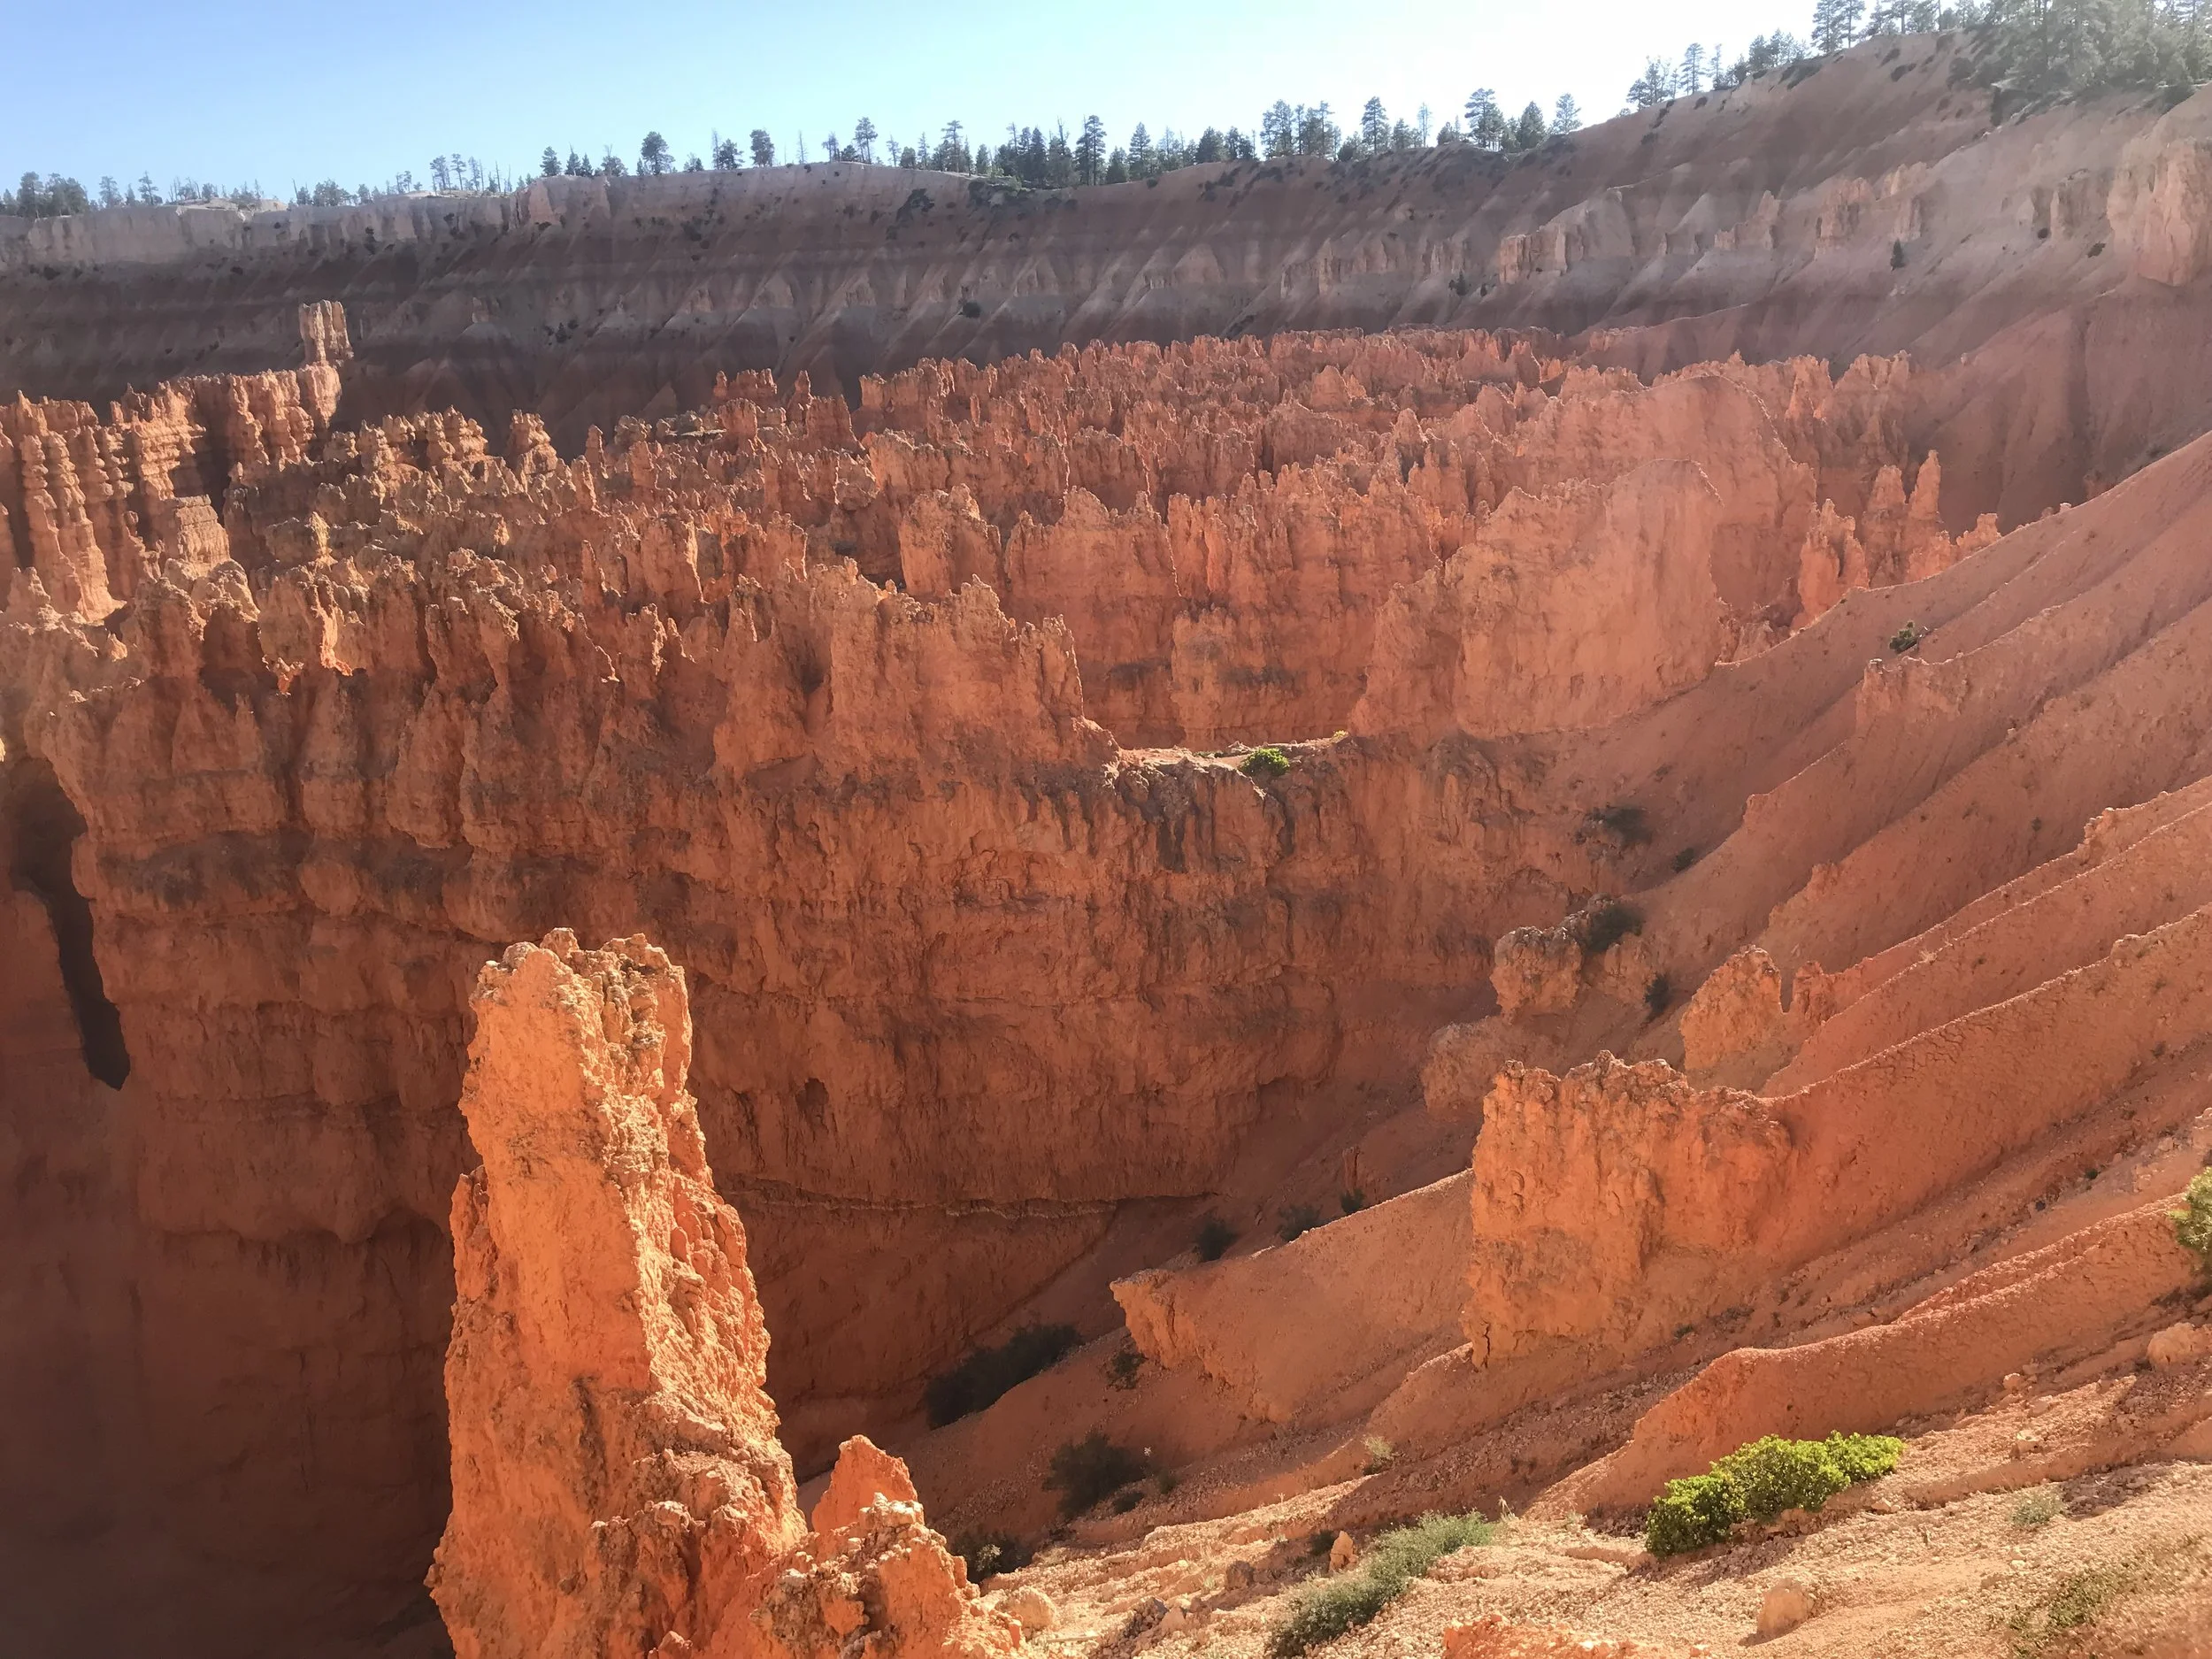
Bryce Canyon Amphitheater. Photo courtesy of Nadia Mercado
We pulled into Bryce Canyon National Park around 1730 hrs and parked at Sunset Point. I had never seen so much orange in my life the way I did at Bryce Canyon. Ice, water, and erosion of sandstone, mudstone, and limestone led to the creation of the Hoodoos—towering sandstone rock formations in varying colors of orange and pink—each its own individual work of art. We walked the Navajo loop trail counterclockwise as it provided us with a beautiful view of the trail as we traversed several switchbacks on our way down to the Amphitheater. Since we were pressed for time, we did not get to do the Queens Garden Loop trail. Instead, we made our way back and walked the paved trail towards Sunrise point. We found a nice secluded spot by a tree, cooked our camp dinners, and watched the sunset over the park. As the night progressed the view of the night sky was unparalleled. I definitely recommend this to any person visiting Bryce Canyon. After stargazing for a few hours we went back to our camp and prepared for another early morning.
*** Pro-Tip: Make sure to check the weather before your road trip. Nighttime at Bryce Canyon was significantly colder than all of the other parks and my friends and I were unprepared. We almost froze our butts off that night. Make sure you pack accordingly for both blazing daytime temperatures and and colder nights.***
Day 4: Page Arizona: Horsehoe Bend, Upper Antelope Canyon, and Lake Powell
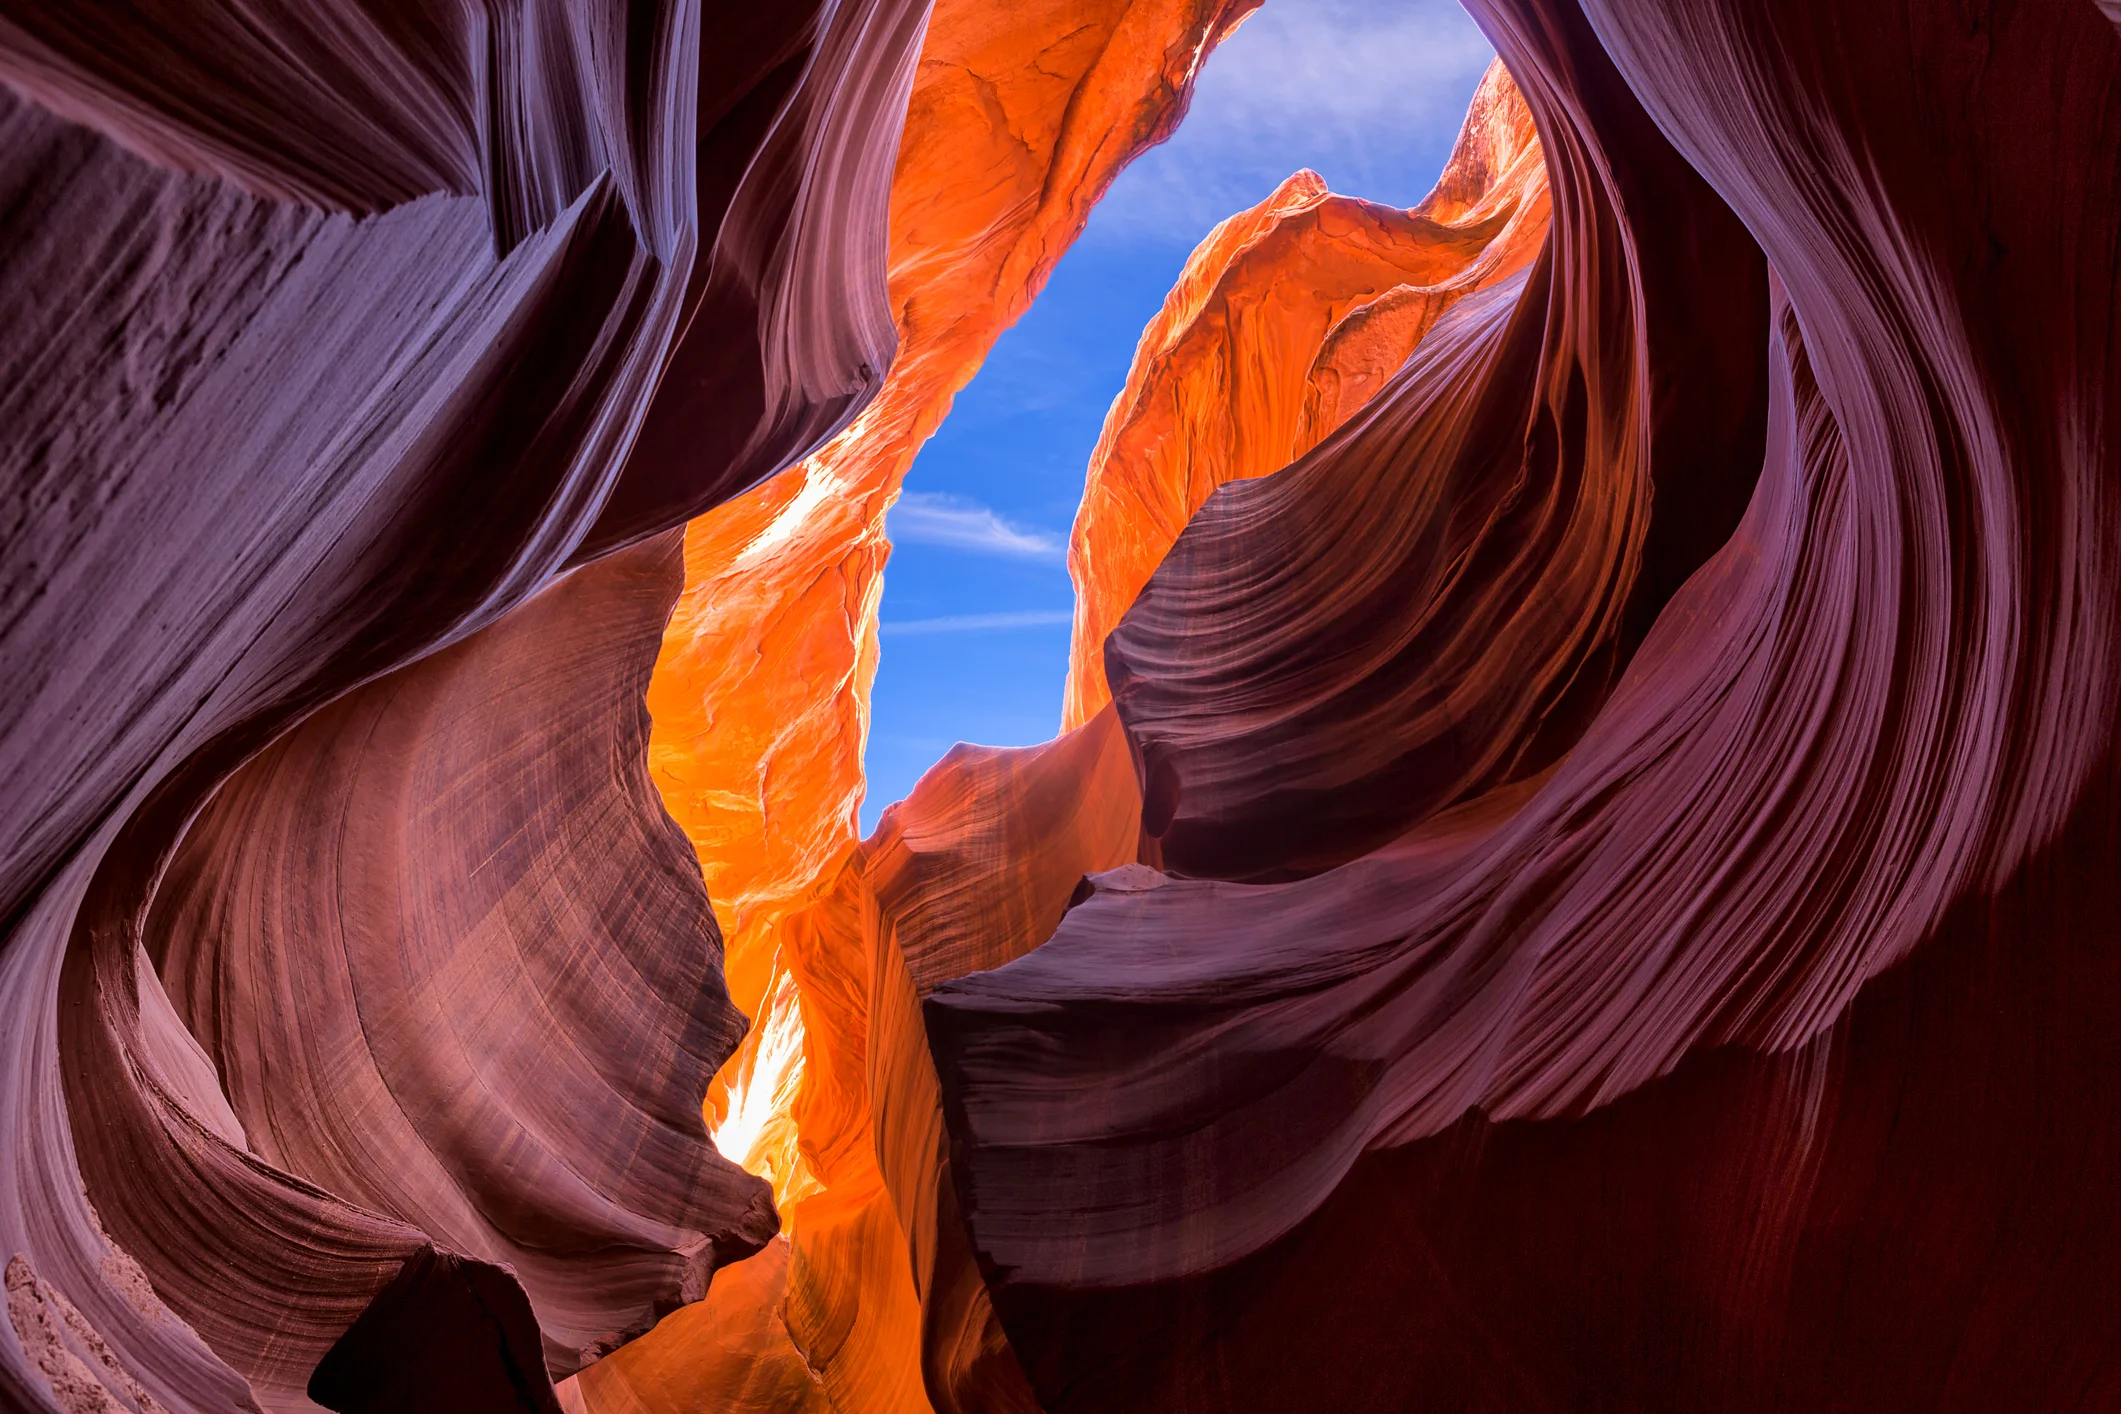
Photo of Lower Antelope Canyon (Photo credit: Getty Images)
After waking up to a very cold morning, my friends and I began our long trek down to Page Arizona to see all the wonders the area had to offer. Thankfully since Mountain Time is one hour ahead of Arizona time, we were able to leave an hour later from our campsite at the Riverside Ranch to make it within our desired time to Arizona. The first thing we did when we got there was rent our paddleboards with Lake Powell Paddleboards. This shop had incredible customer service with very affordable prices. The rental also includes a mounting rack, so all vehicles can take their paddle boards or kayaks out the lake. After conversing with the very kind gentlemen working the front desk, who helped us plan our day, we decided to save the lake as our last activity for the day and proceeded over to our next location, Horseshoe Bend.
Horseshoe Bend... Beautiful landscape, excellent place to flex for gram but VERY OVERCROWDED! Horseshoe bend is conveniently located 8 minutes away from the local Walmart. This makes it very convenient for the 1000s of tourist who visit this spot in one day as they are in close proximity to water, hats, etc. On a cool day hydration isn’t very necessary as the trail down to the bend is only half a mile, but in the middle of June 2 liters of water is precisely what you need. The walk is short and easy and because of its accessibility and the instant reward of a beautiful view it is covered with people everywhere. We made it to Horseshoe bend around noon to find at least 700 people in the area with us. We lingered for about an hour as we waited for people to take their photos in the ideal spots so that we can then take our photos in those same spots. Yes, the photos were beautiful but now knowing what I know… I will likely try to make it during a less crowded time, like sunrise. This is easy the most skippable part of the trip.

Upper Antelope Canyon. Photo courtesy of Melissa Ameen
Upper Antelope Canyon
Next we toured Upper Antelope Canyon. Antelope Canyon is a giant slot canyon located on Diné Land. We purchased a tour with Chief Tsosie’s Antelope Canyon Tours. Unfortunately, we were unable to get primetime slots. Prime time is around noon when the sun is directly over the canyon. Sunlight from directly overhead reflects off the canyon walls and sand below, creating a mesmerizing cascade of light, shapes and colors If you want to get a slot at this time, your best bet is to book a date months in advance. The regular tour lasts approximately one hour as each company tries to fit in as many groups as possible. If you upgrade to the photography tour, you’ll be able to spend more time in the area. We did not tour Lower Antelope Canyon; in retrospect, I wish we had toured it as it is known to be a lot less crowded. Regardless, my group and I were very grateful for the opportunity to be able to recreate on Diné land.
Camping on the Beach!
Although Arizona is a landlocked desert my friends and I got to camp on the beach! The lovely tour guides at Lake Powell paddle boards referred us to a spot at Lake Powell with a secluded beach and camping. My friends and I made it to the boat dock around 5pm. We used trash bags and dry sacks to pack in supplies we thought we might need for the night: dry clothes, food, a sleeping bag, bug spray, and water. Since this was our first time paddle boarding we were unsure of how much to bring. We also didn’t want to weigh down our boards. Looking back, we should have brought bungee cords in order to help us keep our items in place. The paddle to the beach was quite difficult. By early evening we were paddling against the wind and the waves. Even so we made it to the beach within an hour.
Everything about this secluded campsite was completely worth it! It was completely empty and we enjoyed the opportunity to explore the canyon around us. We watched the sunset on the rock and shared a box of wine as we watched the sky darkened and the stars came into view. The night sky over Lake Powell was breathtaking. As the temperature dropped we laid our sleeping bags over our paddle boards and crawled inside. I watched as a cloud formed in the sky—it was the Milky Way. Growing up in a working class Ft. Lauderdale neighborhood I never had the opportunity to go camping or stargazing and there was always too much light pollution to even see the stars—really see them. The night sky over Lake Powell was a truly humbling experience. As I fell asleep that night I kept whispering to myself, “thank you God for making me so lucky.”

Sunrise over Lake Powell, Arizona. Photo taken by Nadia Mercado
Day 5: Lake Powell + Home
The next morning we woke up shortly after sunrise at 0600 and paddled through the lake some more.
** Tip: If you are going to paddle through Lake Powell, this is the best time to do so. Sunrise on the lake is peaceful and the water appears undisturbed like a glass mirror below you.**
With no sounds to disturb us, we were able to enjoy nature in a very spiritual way. We paddled for a little over an hour and then gradually made our way back to the shore. That was followed by breakfast burritos at a local taco shop. Afterwards we made our way to the rental place to return our paddle boards. This place was nothing short of incredible.
After spending a little over an hour at the local Walmart parking lot to organize our things and freshen up in the bathroom, we began to make our way back to Vegas. The drive from Page to Las Vegas was long but worth it. We got to see other parts of Arizona and Utah that we hadn’t seen before. We also spent the time processing all the beautiful things we had seen. This trip was not easy; we had VERY early mornings, but it was incredibly worth it. This area is lush with life and color. Between the red rocks of the southern Arizona desert, rainbow colored waterfalls, beautiful slot canyons and my first glimpse of the Milky Way, I am so grateful to have gone on this trip and I hope more folks can enjoy it too.
While on these lands we practiced Leave No Trace Principles…
Plan Ahead and Prepare
Good thing you have this awesome article to refer to
I used maps and articles on National Parks Service Page
Make sure to check the weather forecast and trail conditions beforehand.
Travel and Camp on Durable Surfaces
Durable surfaces include established trails and campsites, rock, gravel, dry grasses or snow.
Camp at least 200 feet from lakes and streams
Find a campsite, don’t make one
Hike on existing trails, making your own or hiking along the outer edge of a trail can disturb the plant life and soil.
Dispose of Waste Properly
Whatever you Pack In, Pack it Out!
Pick up any leftover trash or litter you see on the ground
Dig a hole at least 6 to 8 inches deep to bury your poop. Make sure it is at least 200 feet away from water, camps and trails.
Make sure to cover and disguise your poop once you are done.
If you need to wash your dishes carry water at least 200 feet away from streams and lakes. Be sure to use biodegradable soap and scatter the dishwater.
Leave What You Find
Leave rock the rocks and plants where you found them.
Do not build structures, furniture or dig trenches.
Do not introduce non-native species.
Minimize Campfire Impact
Avoid it when you can: campfires can literally DESTROY a forest… If you can, cook your food on a lightweight camp stove,m. Use a lantern for light. The best way to prevent a forest fire is to not start a fire.
If you must set up a campfire, be sure to use established fire rings.
Burn all wood and coals to ash and then make sure to put your fire out COMPLETELY.
Listen to our friend Smokey the Bear “Only you can stop forest fires.”
Respect the Wildlife
Do not approach, feed, or touch the animals. Thanks!
Protect the wildlife and your food by storing it in airtight containers. I use these biodegradable odor proof trash bags and then place that in a waterproof dry sack.
Be Considerate of other Visitors
If you see someone struggling on the trail, lend them a helping hand.
If you are hiking and someone is moving faster behind you, take a second and give them space to pass you.
Respect the folks around you, public lands are meant for EVERYONE, leave your biases at the trailhead.
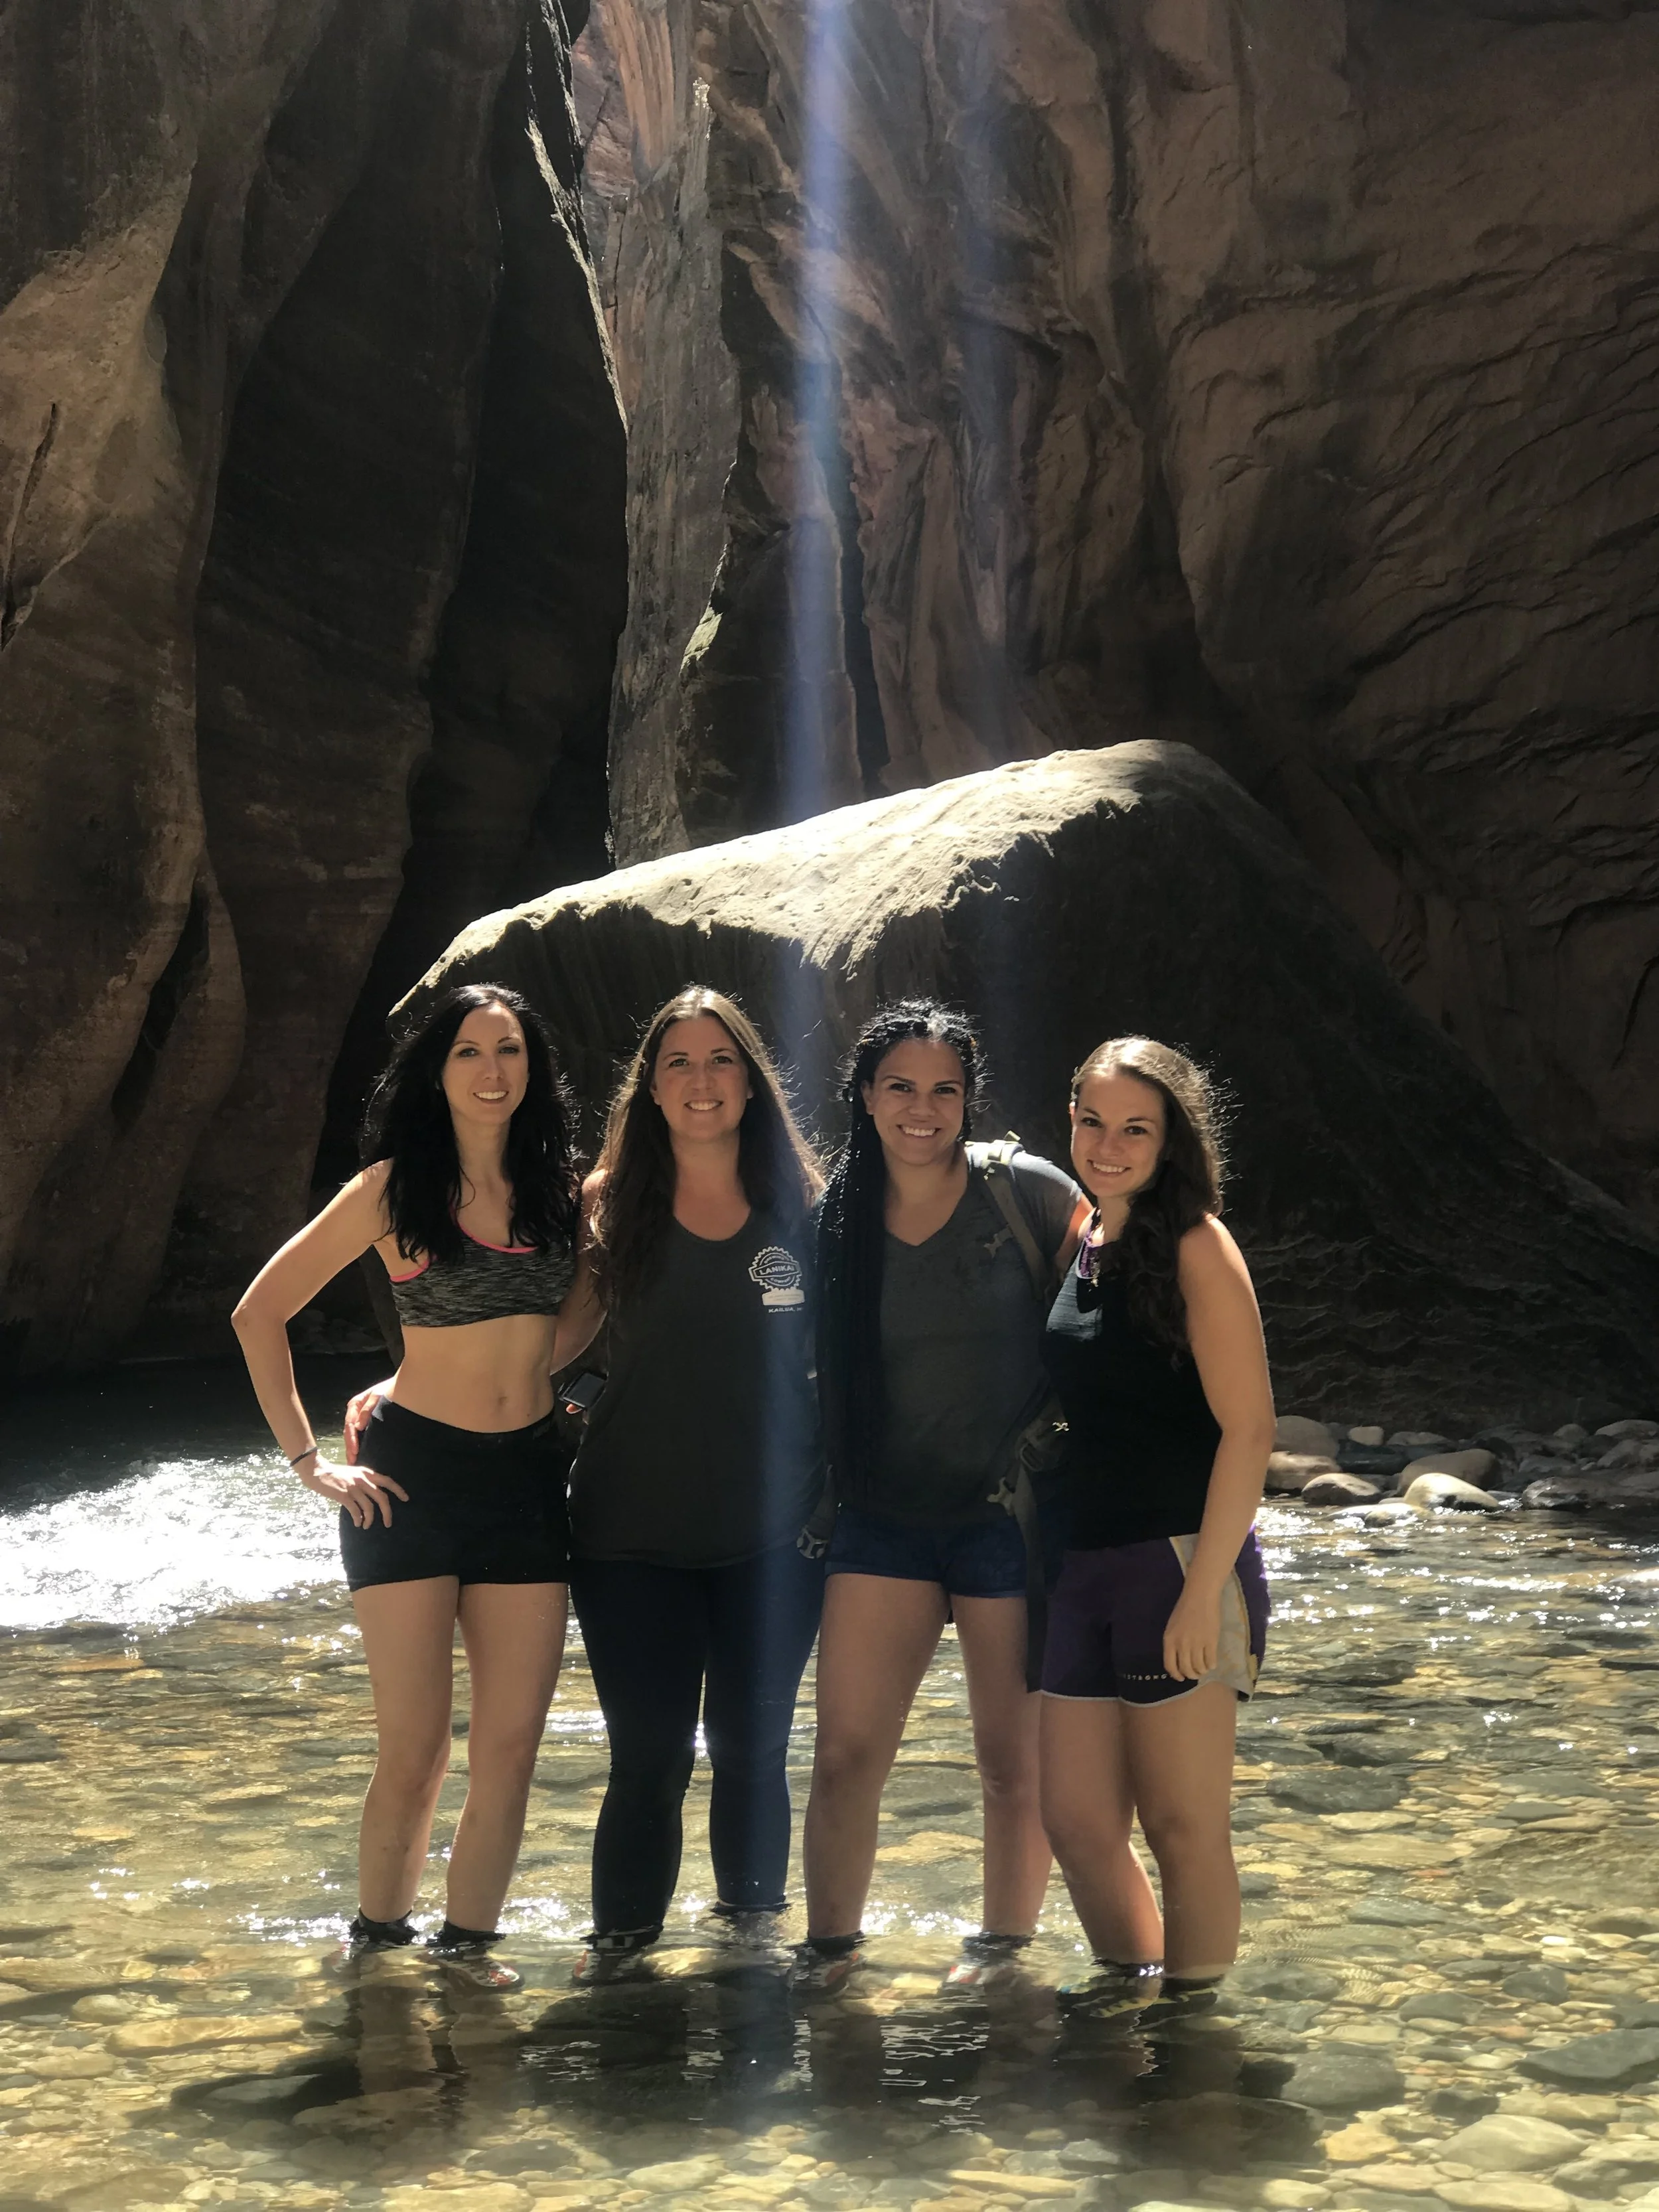
The Narrows, Zion National Park. Left to Right: Amber, Laura, Nadia, Melissa
Here is a packing list from my trip
Sleeping Supplies
· Tent
· Sleeping bag
· Sleeping pad
o (Big Agnes Insulated Air Core Ultra- 3 season)
· Backpacking Pillow
o (Therma- Rest Compressible Pillow)
· Camp light
o (Luci- Inflatable Solar Light)
· Small Rope- To hang clothes
· Ultralight Towel
Clothing
· Shorts/ Capris
· T- shirts/ tank tops
· Rain Jacket
· Bandanas/ Head Buffs
· Hiking boots
· Camp sandals
o Chacos
· Light weight packable coat
o (Patagonia Nano puff Jacket)
· Wide Brimmed Hat
· Lightweight Wool Socks
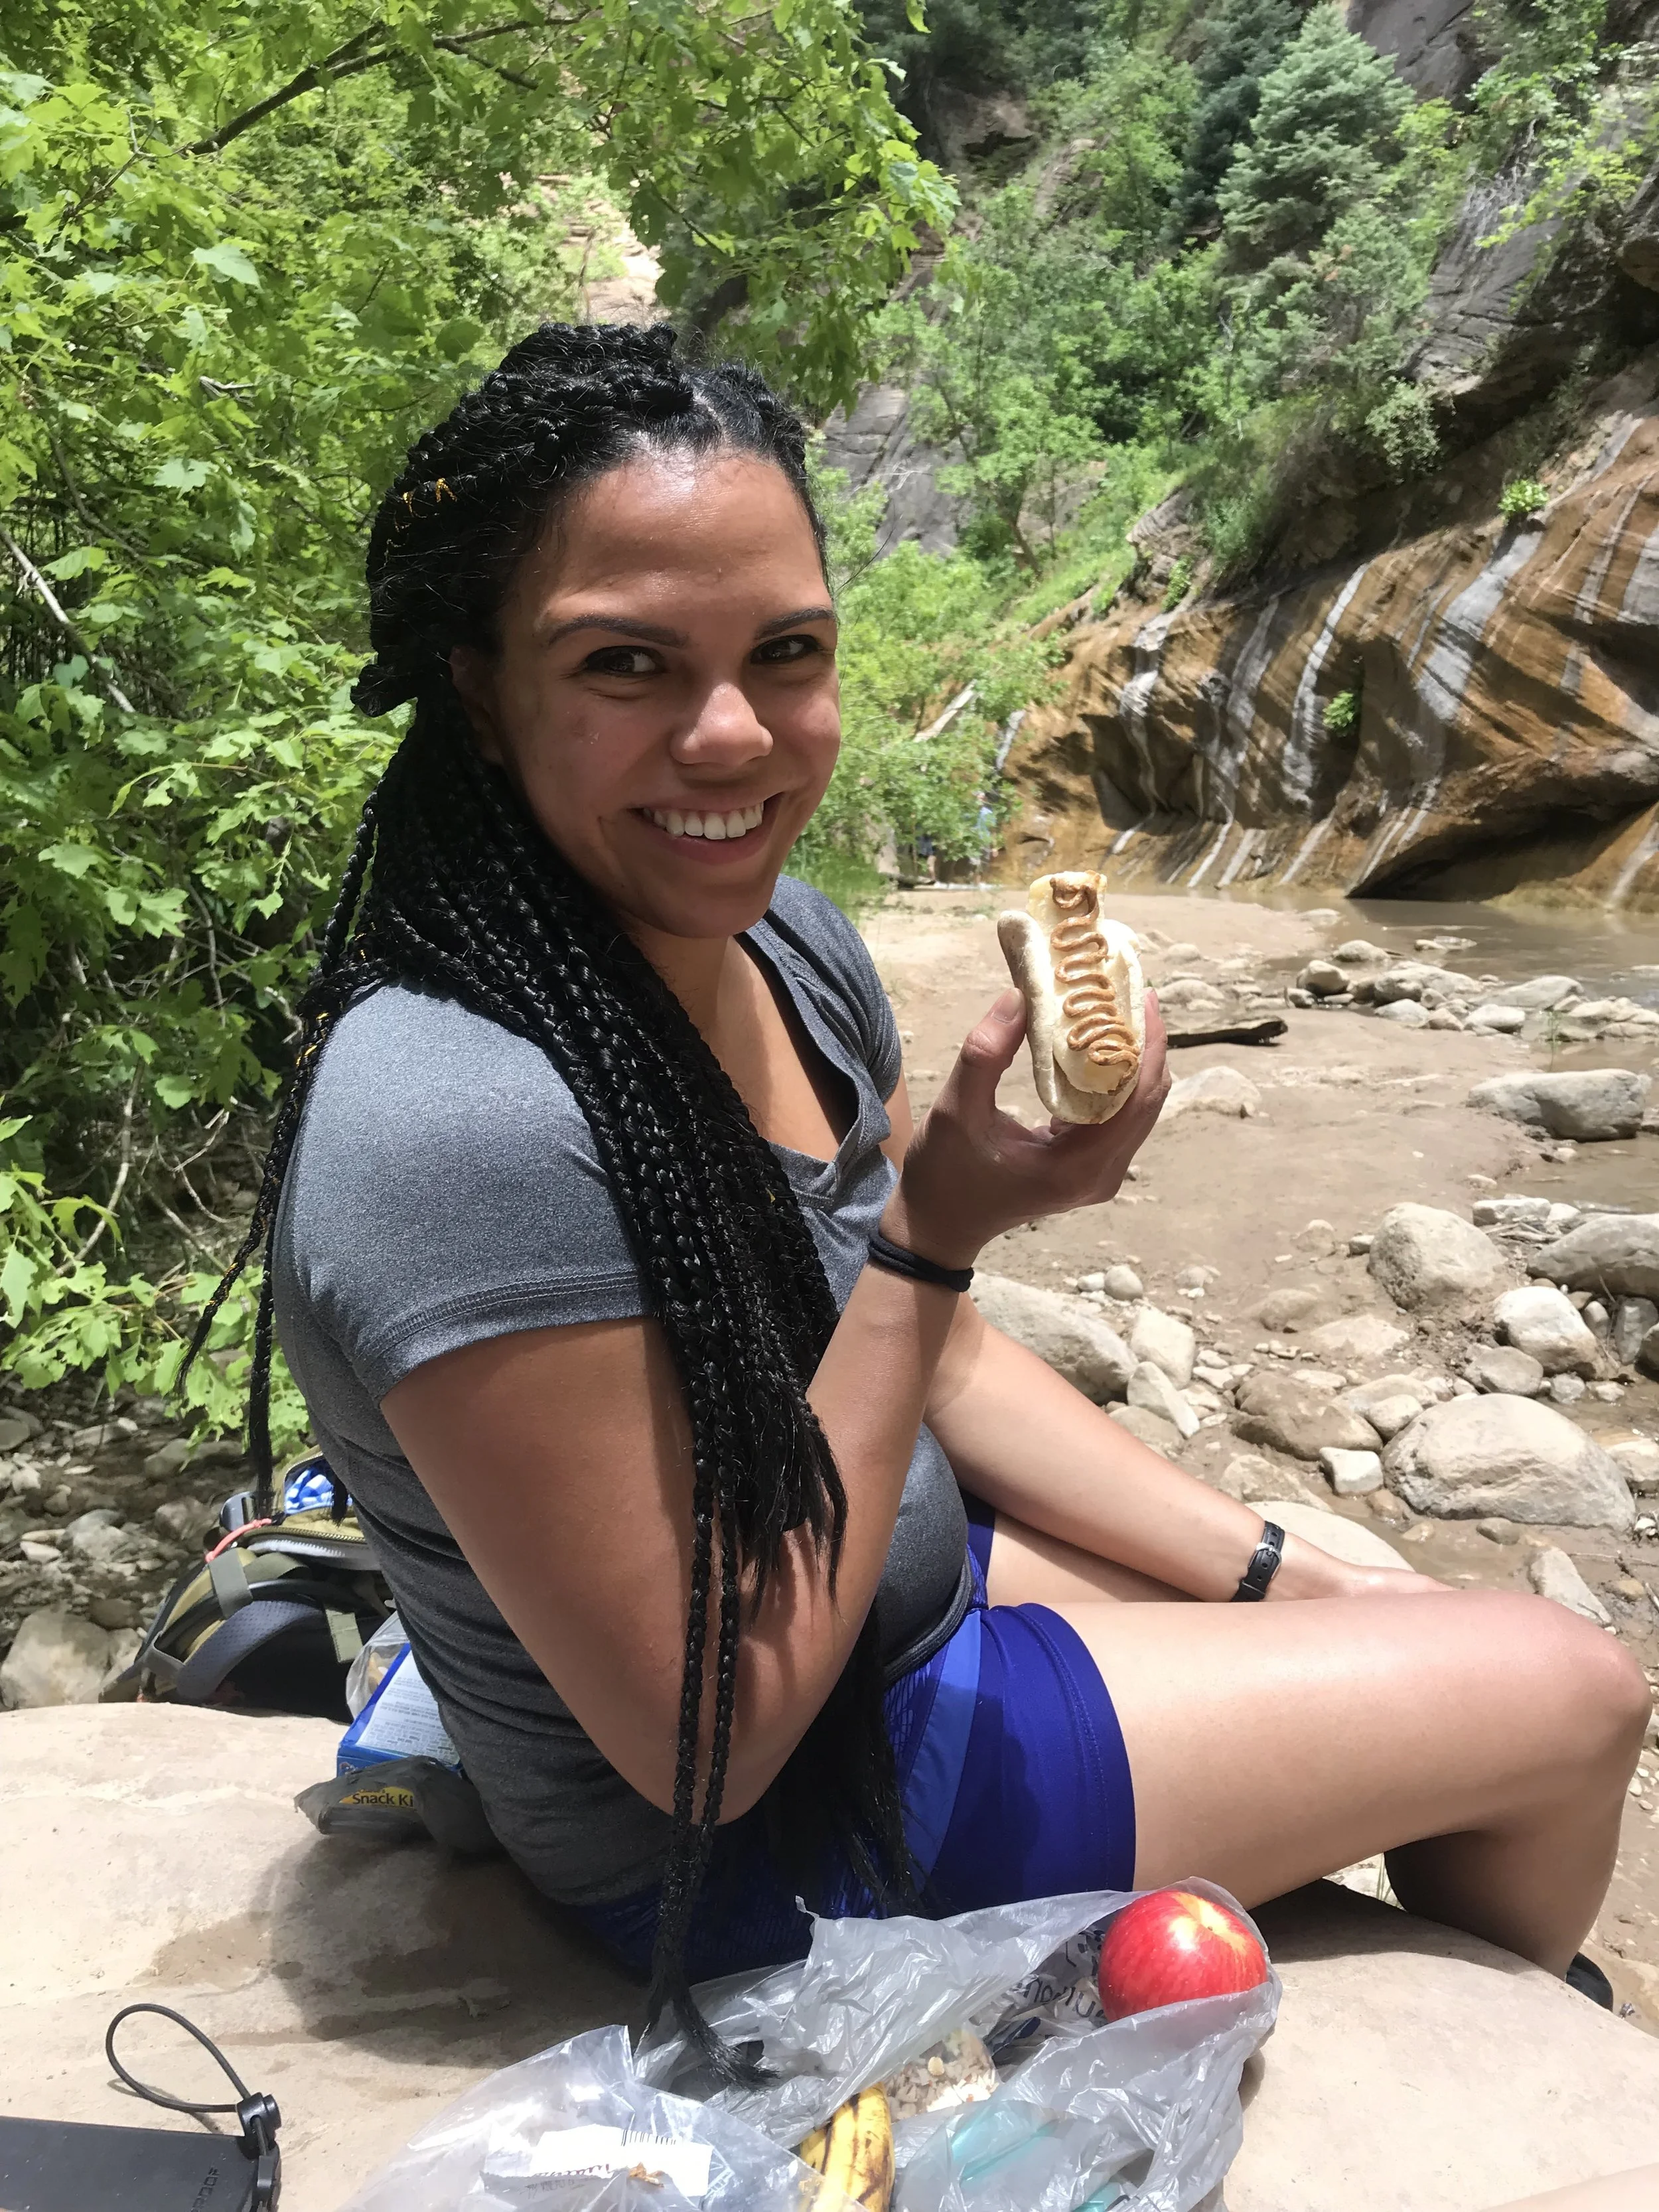
Nadia eating a banana on a bagel thin with an almond butter topping. Photo taken by Amber Saterlee
Eating Supplies
· Backpacking stove
· Backpacking meals
· Homemade Breakfasts
o (Oatmeal, with boiling water)
· Reusable spoon/ fork
· Heavy Duty Matches
· Water Filtration System
· Coffee
o (REI- Alpine Start Instant Coffee)
· Water Bottle + Hydration Bladder
· Non- Perishable snacks
o Almond Butter
o Carrots
o Trail Mix
o Ready made quinoa cups
o Dried Chickpeas
o Tuna
o Crackers
o Bananas + Apples
o Avocados
o Nonperishable Hummus
o Bagel Thins
Other Supplies
· Day Pack
· Compression Sacks
· Waterproof Backpack/ Dry Sacks
· Duck Tape:
Be sure to bring this! Amber literally lost the soles of her shoes on Angel’s Landing. Duck tape helped tape her boots together. Literally a life saver!
· Sun screen
o Hawaiian Tropic
· Bug Spray
· Extra Hair Ties
· Save your Walmart bags and use them as trash Bags
Zion National Park, Utah
I hope you find this itinerary helpful! Blue Skies and Happy Trails!


At thirty years old, I had never held a fishing rod. Never tied a fly, never cast a line, never felt the tug of a fish fighting on the other end. But I'd always been drawn to the idea of fly fishing.